GuideHow to use the WordPress Toolkit in your control panel
Last updated: 29 October 2026
Every WordPress website in the control panel comes with the WordPress Toolkit. It logs you in to WordPress without a password, and lets you choose how WordPress updates, add and switch off plugins and themes, add users, reset a password and put your website into maintenance mode. It works even when WordPress itself won't open. This guide shows each part and when to use it. It takes about five minutes.
Open the WordPress Toolkit
- In the control panel, open Websites in the left sidebar and choose your website.
- Click Apps at the top. Your WordPress site is listed under Applications.
- Click Toolkit next to it.
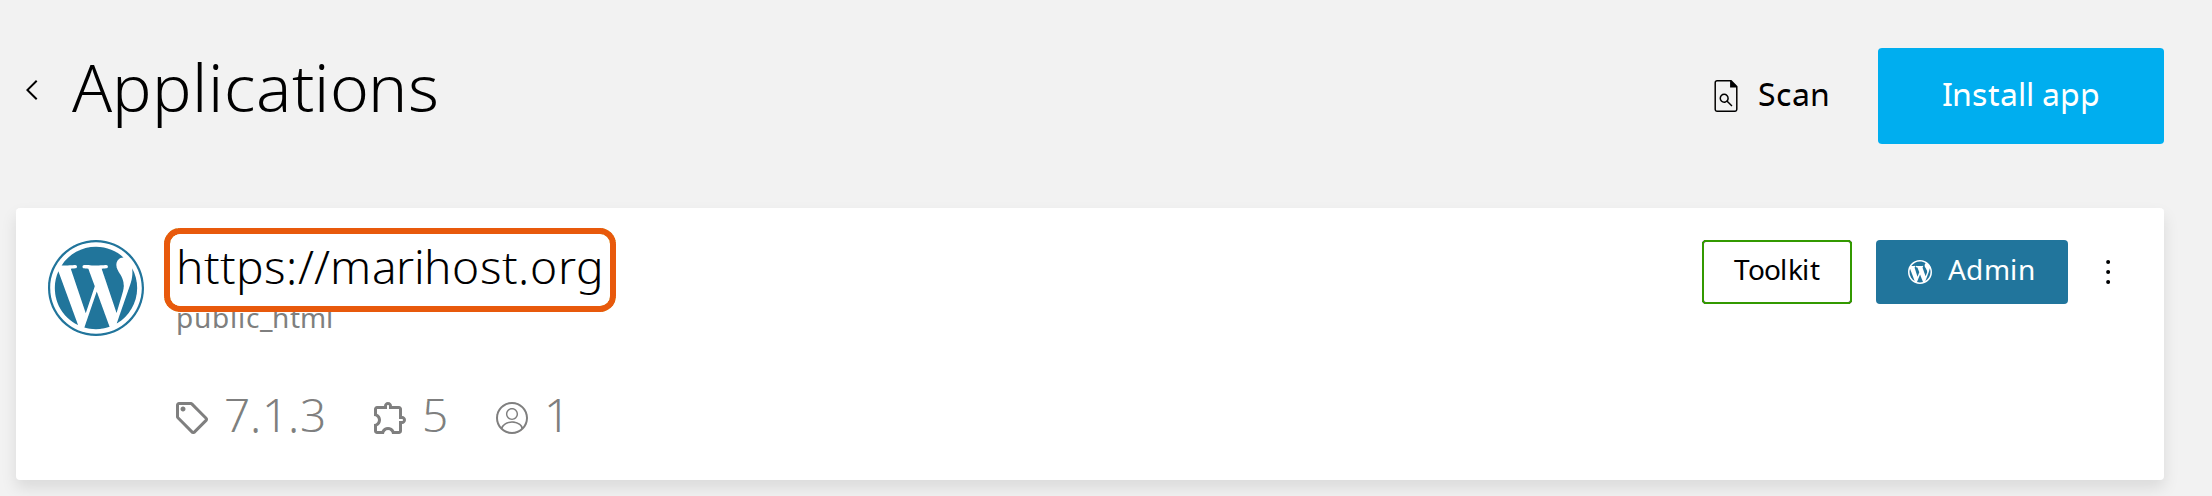
The Toolkit opens on General. The list on the left jumps to its other parts: Plugins, Themes, Users, Single sign on and Debug.
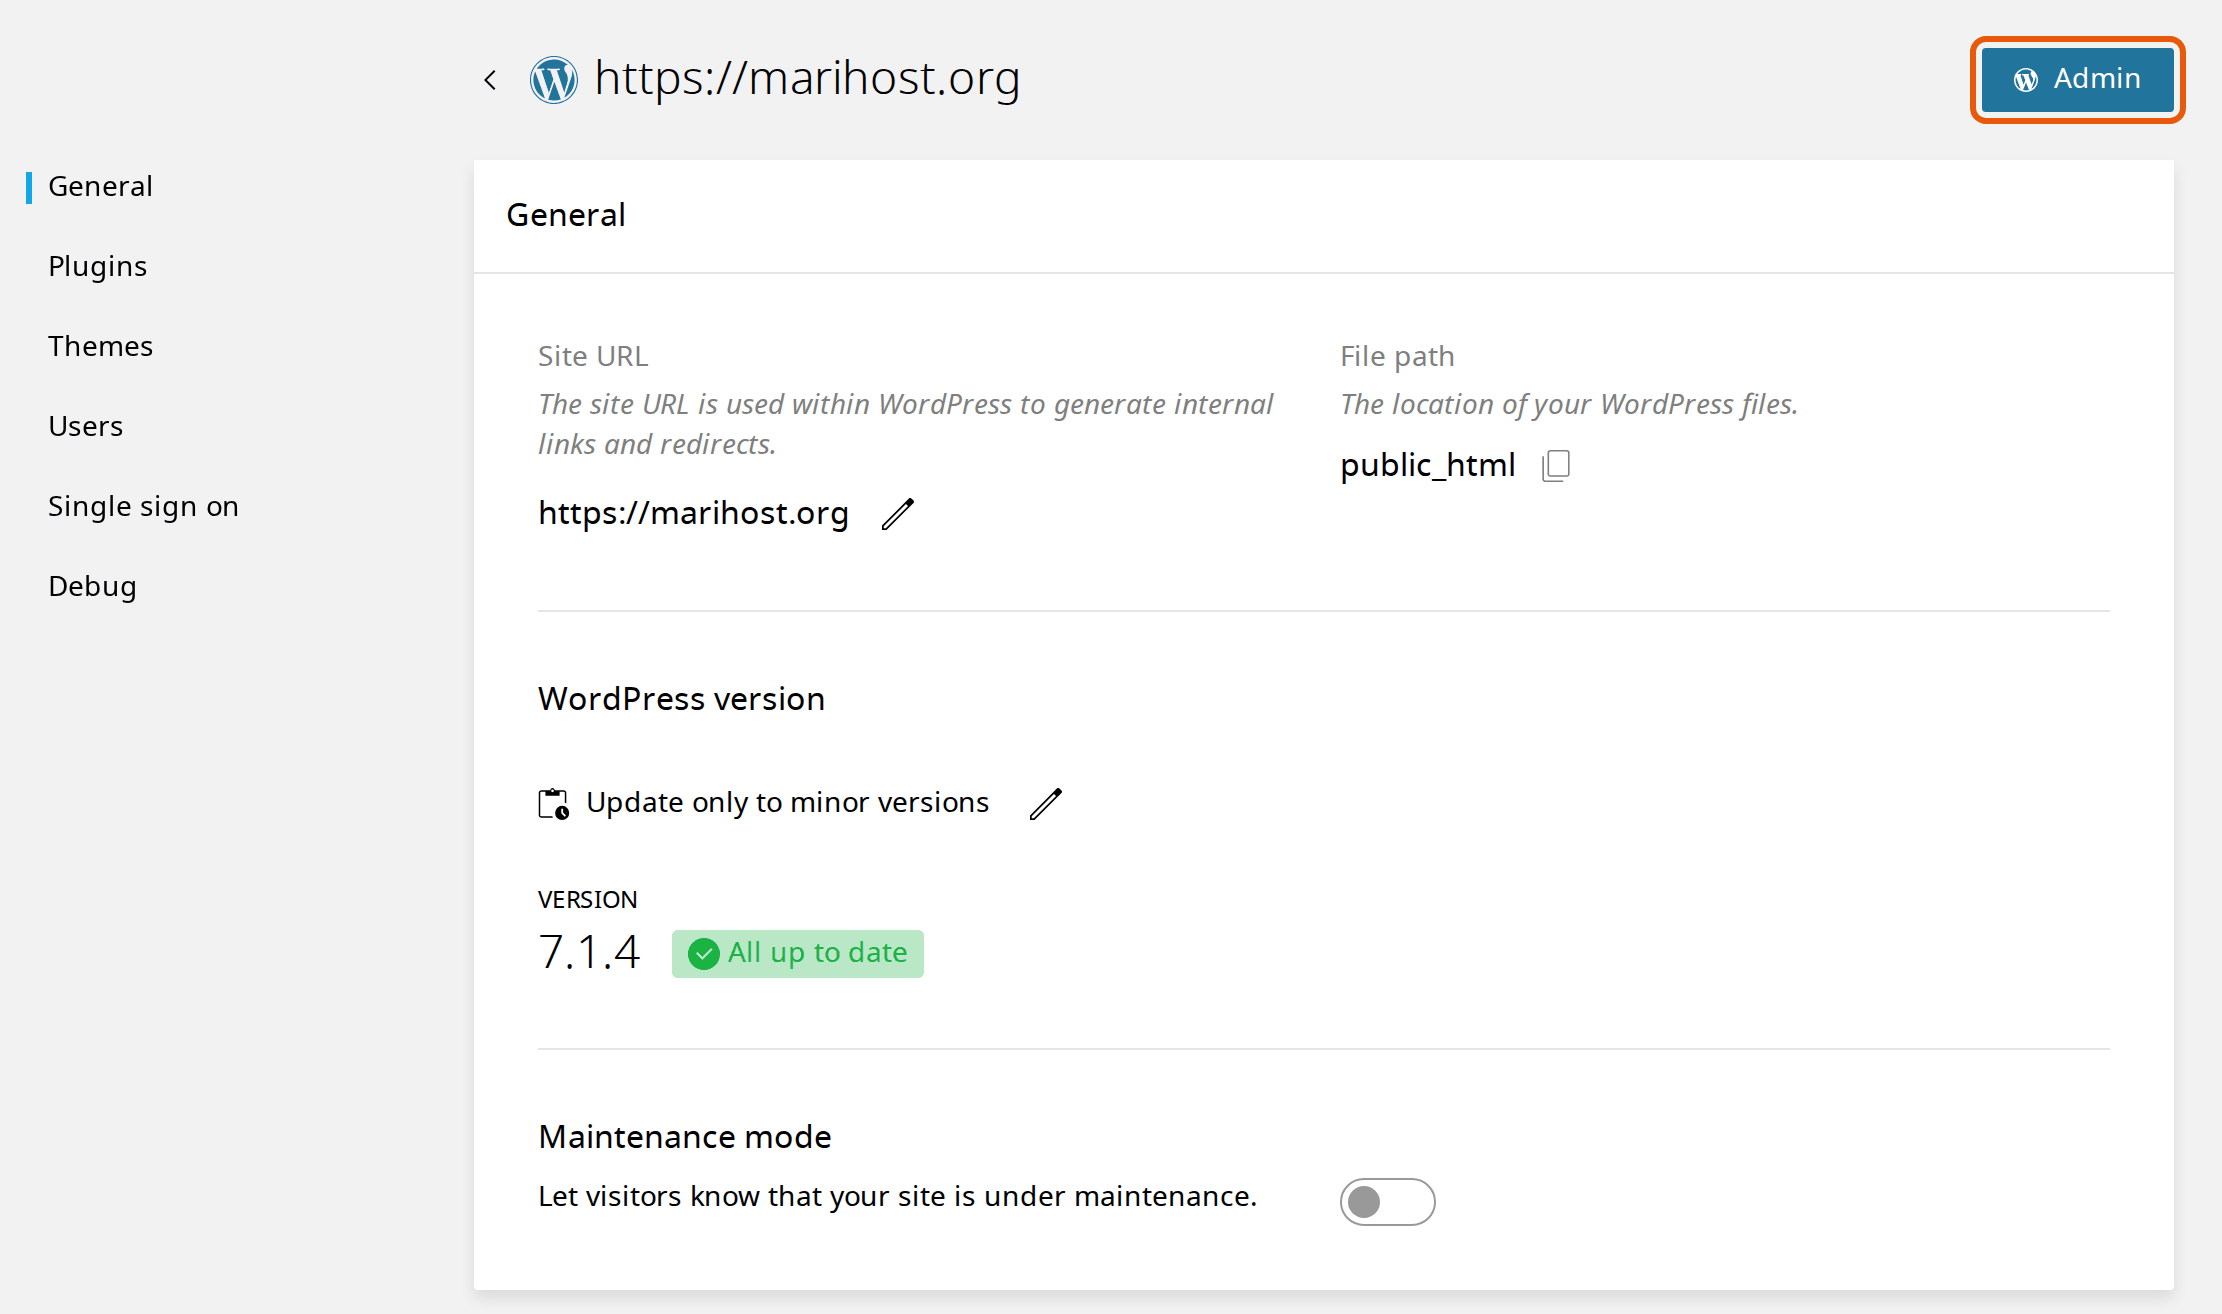
Log in with one click
Click Admin at the top right. WordPress's dashboard opens, already logged in, so you don't need your WordPress password. You'll find the same Admin button on Apps.
It logs you in as the user shown under Single sign on. Anyone who can sign in to your control panel can open your WordPress this way too, so keep your control panel login to yourself: to let someone else work on your website, see Give someone access to one website.
Choose how WordPress updates
Under WordPress version, the Toolkit shows the version you have and how WordPress updates itself. To change it, click the pencil next to the setting:
- Update only to minor versions (recommended): WordPress installs maintenance and security releases by itself, such as 7.1.3 to 7.1.4. Major versions, such as 7.2, wait for you: install them in WordPress under Dashboard → Updates once your theme and plugins support them.
- Always update to the latest available version: WordPress installs major versions by itself too.
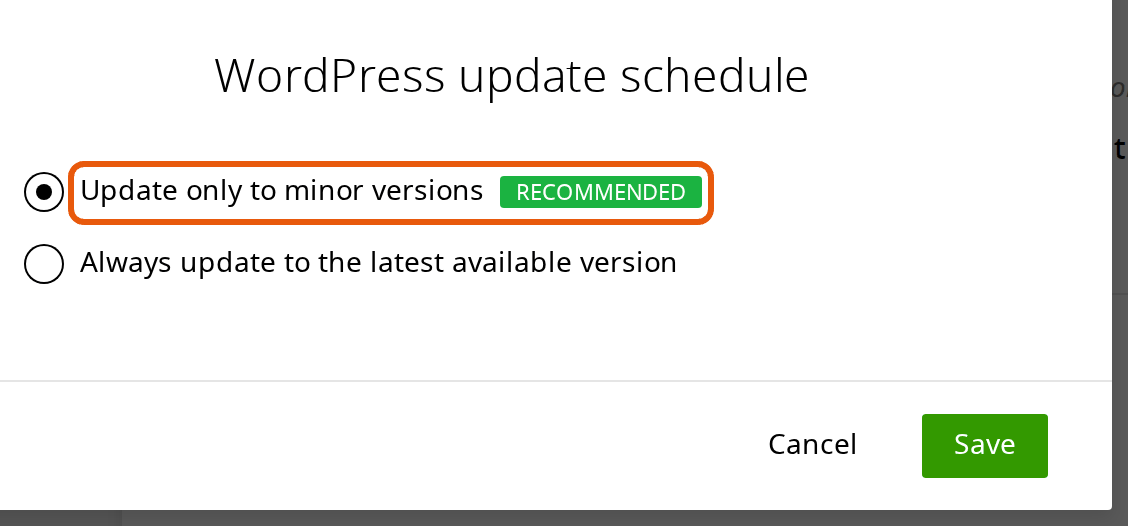
Click Save. Each plugin and theme also has Enable auto-updates, the same switch as in WordPress: turn it on for those you'd rather not update yourself. Your website is backed up every day, so you can go back if an update goes wrong: see Back up and restore your website.
Plugins and themes
Plugins lists every plugin, Active or Inactive, with Activate or Deactivate, Delete and Enable auto-updates. These work even when WordPress shows an error: see Deactivate a plugin without logging in. If the list looks out of date, click the refresh button above it.
To add a plugin:
- Click Install.
- Search for the plugin, or browse Featured and Popular, and click the one you want.
- Click Install.
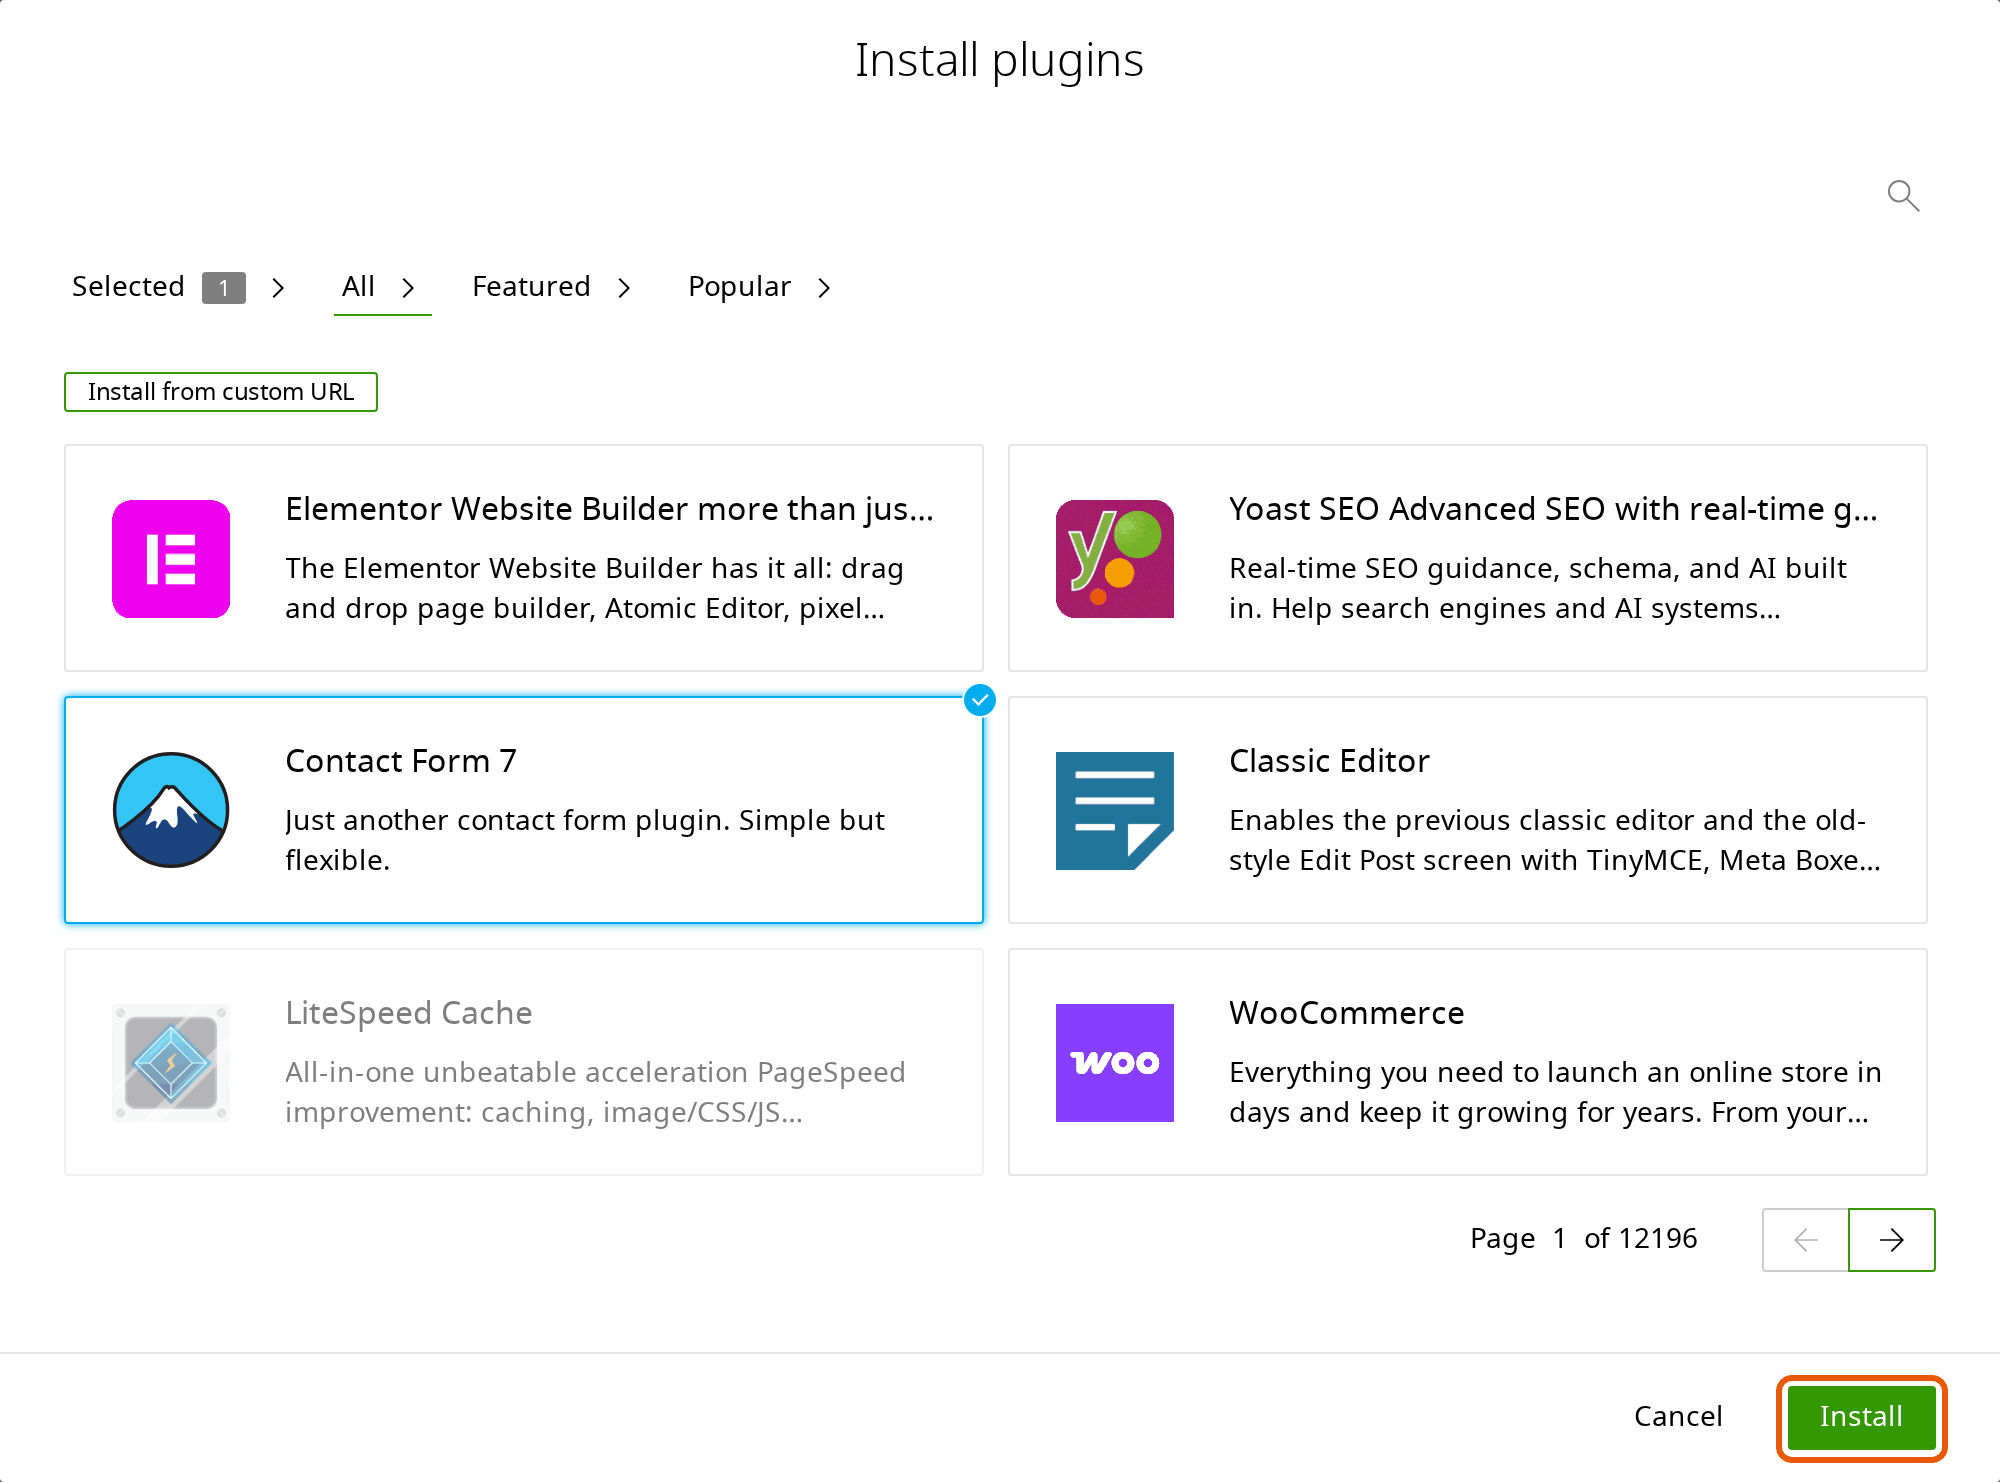
The plugins come from WordPress's own plugin directory. A plugin you bought elsewhere usually has a download address for its .zip file: use Install from custom URL. Once it's installed, click Activate next to it if it isn't active yet.
Themes works the same way. Only one theme is active at a time. Keep one of WordPress's own themes, such as Twenty Twenty-Five, installed: WordPress switches to it if your theme breaks.
Users and passwords
Users lists your WordPress users and their email addresses.
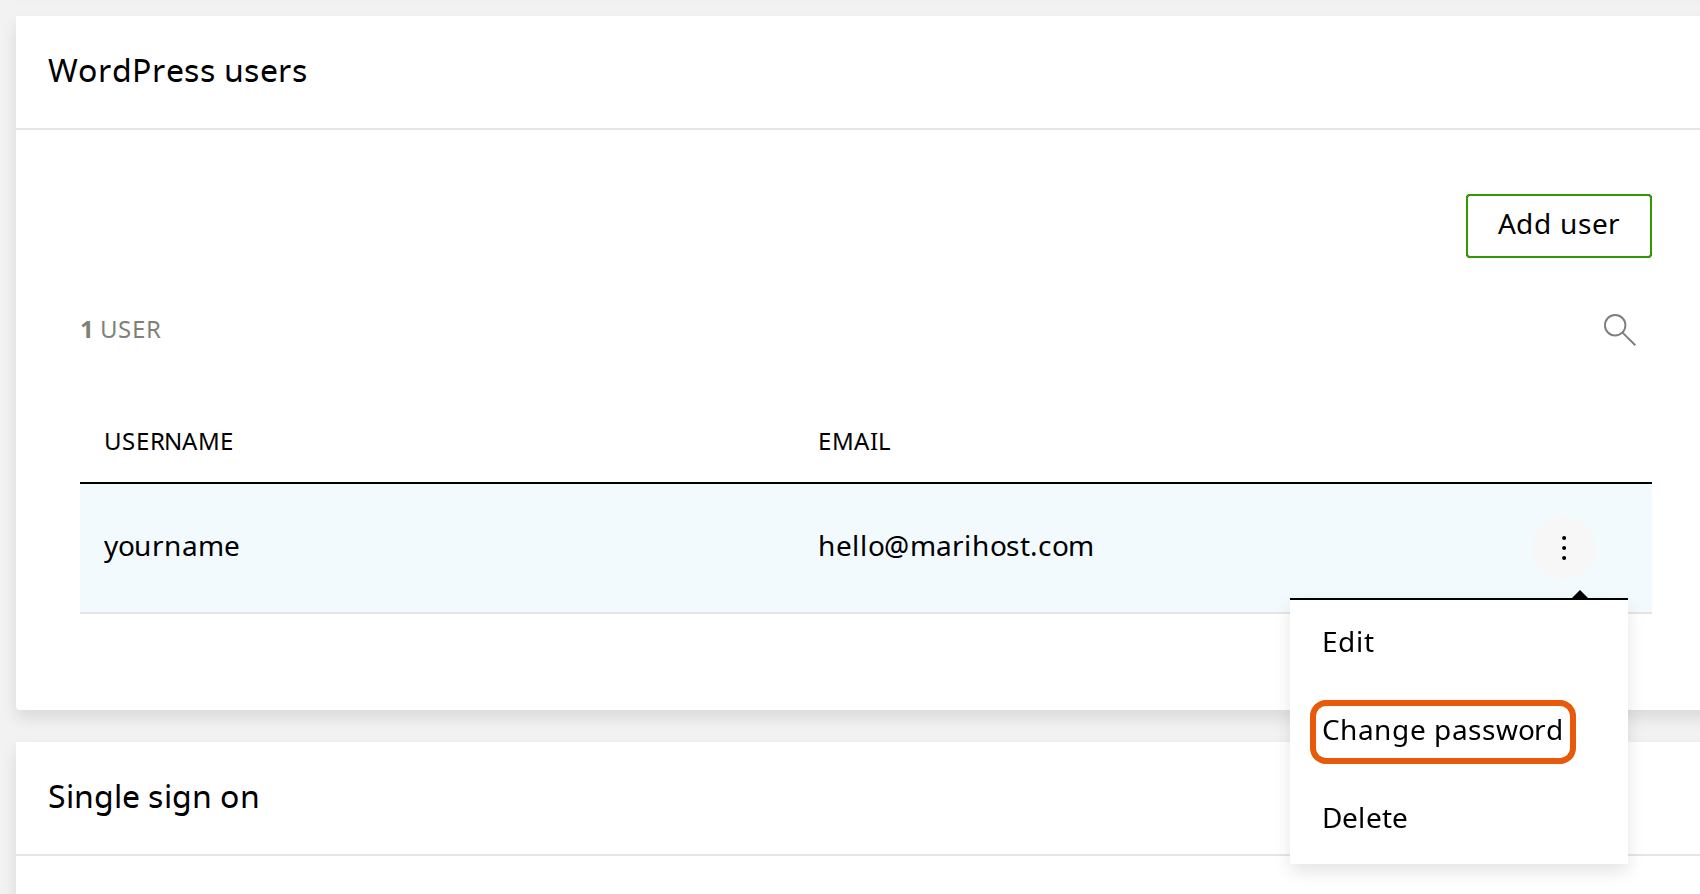
Forgot your WordPress password? Log in with Admin and change it in WordPress under Users → Profile, or set a new one here:
- Click ⋮ next to the user and choose Change password.
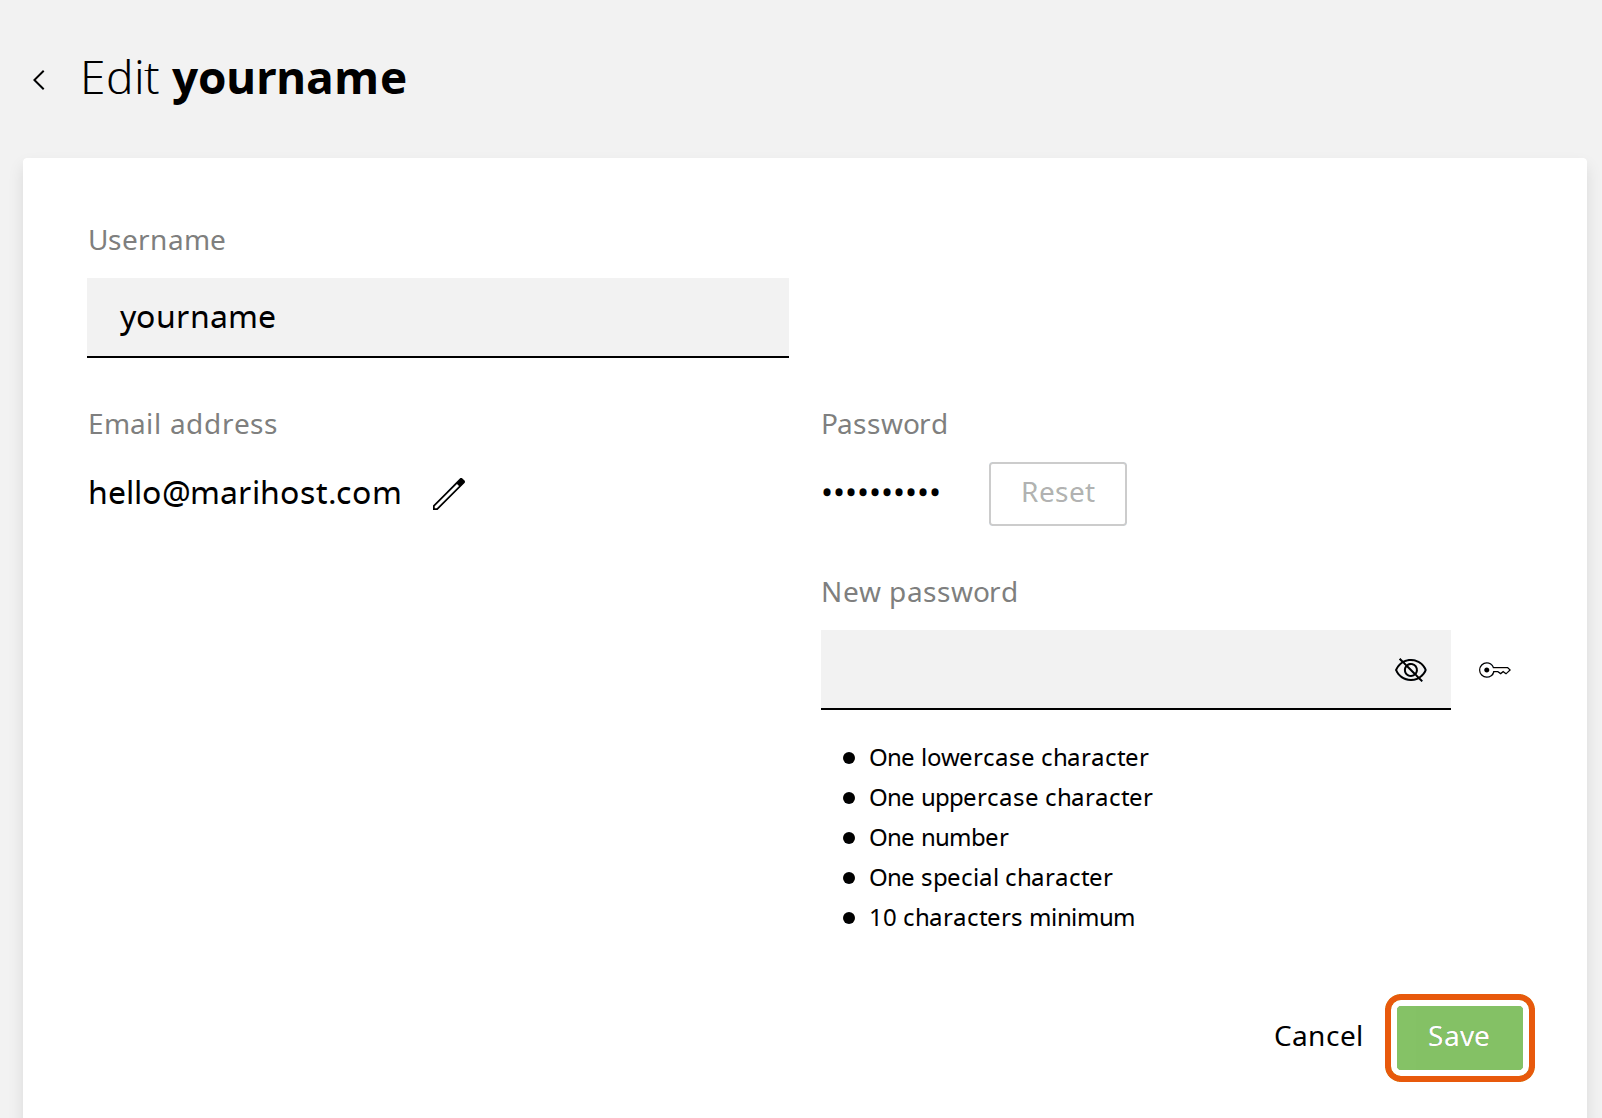
- Click Reset next to Password, type the new password in New password, and click Save. It needs at least 10 characters, with a lowercase letter, a capital letter, a number and a special character.
Add user adds an Administrator, who can change anything in WordPress, including other users. Add someone here only if you trust them with your whole website. For a writer, a shop manager or anyone who needs less, add them in WordPress under Users → Add New User and choose their role there.
To remove a user, click ⋮ next to them and choose Delete. If they wrote posts or pages, delete them in WordPress instead, under Users: WordPress then asks who should keep their content.
Maintenance mode
Turn on Maintenance mode and visitors see "Briefly unavailable for scheduled maintenance. Check back in a minute." Search engines are told the page is down for now and to come back later, so a short break doesn't hurt your place in search results.
It stays on until you turn it off, and your WordPress login page shows the same message, so you can't log in to WordPress while it's on. Turn it off here in the Toolkit when you've finished. Use it for a few minutes while you make a change. For longer work, use a staging copy: see Make a staging copy of your website.
Seeing that message when you didn't turn it on? A WordPress update was interrupted: see Fix common WordPress errors.
The rest of the Toolkit
- Site URL is your website's address in WordPress. Change it only when you move your website to another domain: a wrong address can stop your website and your login working.
- Single sign on shows which user the Admin button logs you in as.
- Debug has WordPress's debugging switches, for finding what causes an error: see Fix common WordPress errors.
- Delete, the red button at the very bottom, deletes WordPress itself, with all its files and its database, and can't be undone. You never need it to fix a problem: leave it alone unless you mean to remove the website.
Next steps
When something breaks, see Fix common WordPress errors. Before a big change, see Back up and restore your website.
Rather we looked after it?
WordPress Care updates your site, checks it after every update, and fixes anything an update breaks.
Keep reading
Deactivate a plugin without logging in
Switch off the plugin that broke your site from the control panel, even while WordPress shows an error.
Read the guideFix common WordPress errors
The critical error, a blank page, database and redirect errors: find the cause and switch it off yourself.
Read the guideBack up and restore your website
Make a backup before a big change, and put back your whole site or only some files, without a ticket.
Read the guide