GuideHow to add DNS records for your domain: A, CNAME, MX and TXT
Last updated: 26 October 2026
DNS records tell the internet where to find your website, where to deliver your email, and prove to services such as Google that you own your domain. If your domain uses our nameservers, you manage its records yourself in the control panel. This guide explains the records you'll meet most, and shows you how to add, change and delete them. Adding a record takes a couple of minutes.
Before you start
- Your domain should use our nameservers, ns1.maridns.com and ns2.maridns.com. Then its DNS records live in your control panel. If your DNS is somewhere else, such as Cloudflare or your registrar, add records there instead: see Point your domain to MariHost.
- You'll usually be given the values to add, by the service you're connecting: Google, Microsoft, a shop builder or an email service. Copy them exactly.
The DNS records you'll use most
| Type | What it does | Example |
|---|---|---|
| A | Points a name to an IPv4 address, such as your website's server | @ → your server's IP address |
| CNAME | Points a name to another name, such as a service's address | shop → shops.example.com. |
| MX | Says which server receives email for your domain, with a priority (lower is tried first) | @ → 1 smtp.google.com. |
| TXT | Holds text that other services read: domain verification, SPF, DKIM and DMARC | @ → google-site-verification=… |
@ means your domain on its own, such as yourbusiness.my. Any other name is a subdomain: shop means shop.yourbusiness.my.
When we set up your website, we add the records it needs: A records for your domain and www, the mail records (MX, and A and CNAME records for mail, imap, pop and smtp), the NS records for our nameservers, and TXT records for SPF, DKIM and DMARC. Leave these as they are unless you're moving that service elsewhere.
Add a record
1. Open your domain's DNS records
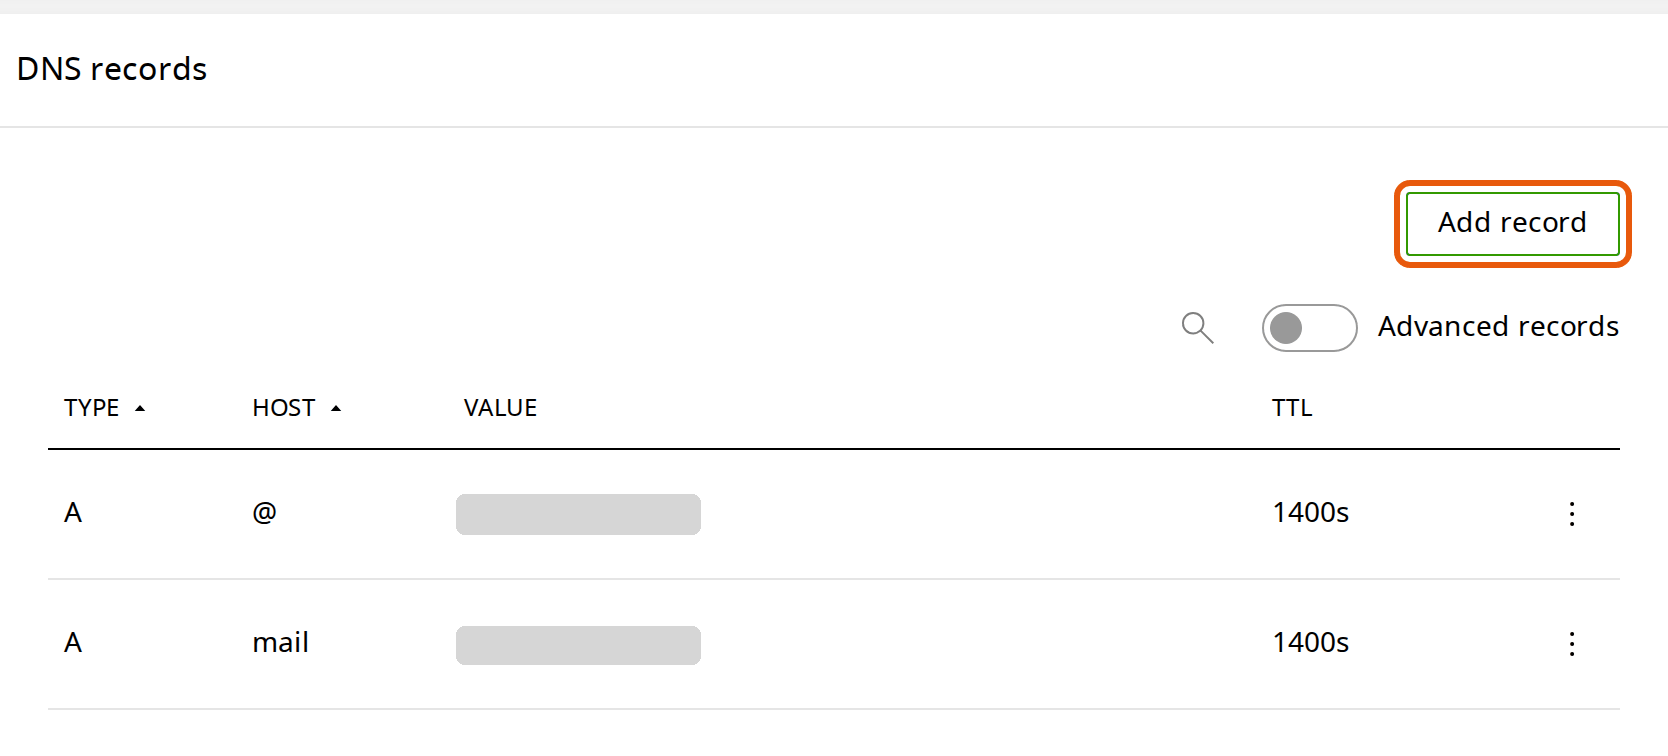
Sign in to your client area at billing.marihost.com, open your hosting plan and click Login to Control Panel. Open Websites in the left sidebar, choose your website, then Domains in the top menu, and click your domain. Scroll down to DNS records, or click it in the menu on the left. In the pictures below, our test website is marihost.org.
2. Fill in the record
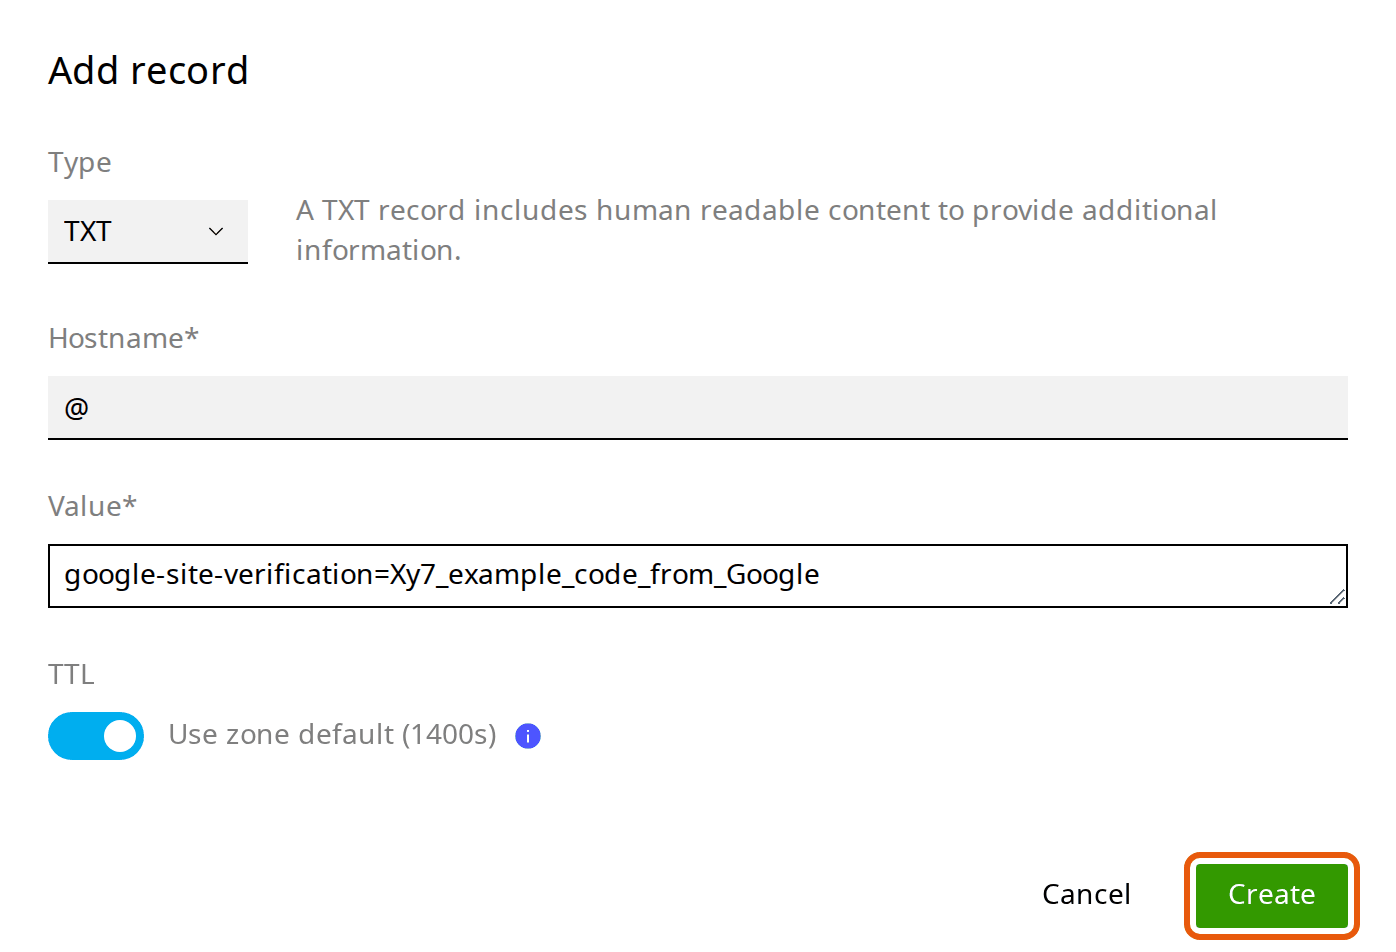
Click Add record. Choose the Type, then fill in the fields for that type:
- Hostname: @ for your domain on its own, or the subdomain, such as shop or www.
- The value: an IPv4 address for an A record, a name for a CNAME (Is an alias of), the Priority and Target domain for an MX record, or the text for a TXT record. Paste it exactly as you were given it, without adding quotes.
- A dot at the end of outside names: when a CNAME or MX record points to a name outside your domain, such as shops.example.com or smtp.google.com, type a dot at the end: shops.example.com. Without it, the control panel adds your own domain to the end, and the record points nowhere. The form reminds you when it spots a name like this.
- TTL: leave Use zone default on. TTL is how long other networks keep a copy of the record before asking again.
3. Create it
Click Create. The record appears in the list straight away, and our nameservers start giving it out within minutes.
Change or delete a record
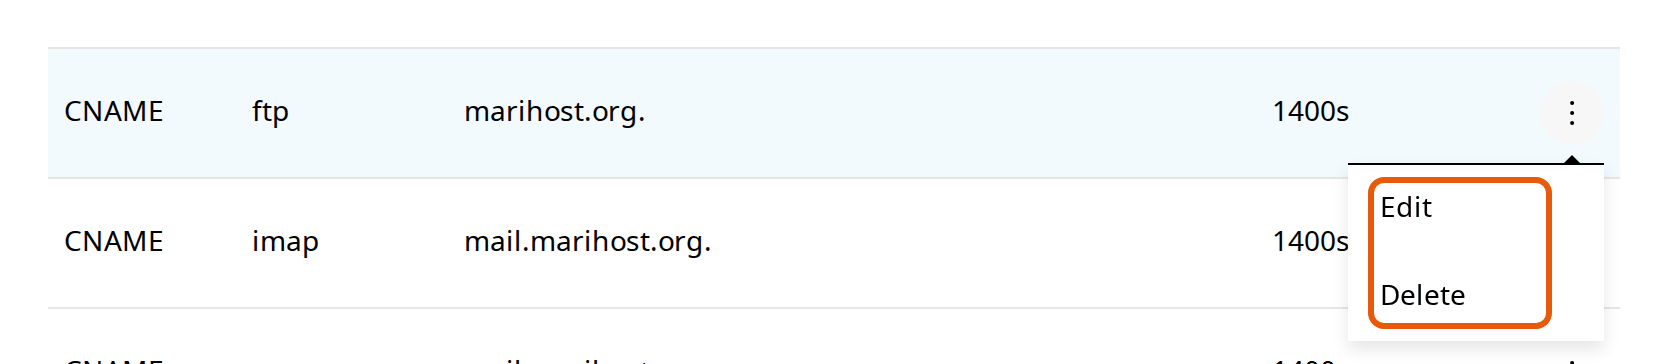
Click ⋮ at the end of the record's row and choose Edit to change it, or Delete to remove it. Deleting asks you to confirm first. The list shows 10 records to a page: use the arrows below it, or the search above it, to find the one you want.
Be careful with the records we set up for you. Deleting the A record for @ takes your website offline; deleting the MX record stops your MariHost email arriving; and the NS records must stay as they are.
Common jobs
- Verify your domain with Google, Microsoft or another service: add the TXT record they give you, with the hostname they say (usually @), then click Verify in their dashboard.
- Use Google Workspace or Microsoft 365 for email: replace our MX record with theirs, and update your SPF record. Our guide Use Google Workspace or Microsoft 365 email has every step.
- Point a subdomain to another service, such as an online shop or a booking page: add the CNAME record they give you, for example shop pointing to their address, with a dot at the end.
- Keep your email out of spam: see SPF, DKIM and DMARC. A domain can have only one SPF record: add to the one you have rather than creating a second.
- Before moving a service, lower the record's TTL to 300 seconds a day ahead: turn off Use zone default and type 300. The switch then reaches everyone within about 5 minutes.
Check it's working
Google's free Dig tool shows your domain's records as the internet sees them. Type the full name, such as shop.yourbusiness.my, and choose the record type. A new record usually shows within minutes; a changed one can take as long as its old TTL, 1400 seconds (about 23 minutes) with our default.
The control panel shows full names with a dot at the end, such as mail.marihost.org.: the dot means the name is complete. That's why you add one yourself to names outside your domain.
If something's not right
The service says it can't find your record. Wait 30 minutes and try again. Then check the hostname: if the service asks for a record on yourbusiness.my itself, use @, not your full domain, or the record ends up on yourbusiness.my.yourbusiness.my.
A CNAME or MX record doesn't work. Check that its target ends with a dot. If Dig shows your own domain added to the end, such as shops.example.com.yourbusiness.my, edit the record and add the dot.
You can't add a CNAME. A name can't have a CNAME and any other record at the same time, so a CNAME can't go on @. Use the A record you were given instead, or ask the service.
Your website or email stopped working after a change. Put back the record you changed or deleted: our default records are listed above. Not sure what was there? Open a ticket and we'll restore your records.
Changes don't show at all. Check your domain uses our nameservers: in Dig, choose NS. If it shows other nameservers, your records are managed there, not in our control panel.
Next steps
Setting up email with Google or Microsoft? Read Use Google Workspace or Microsoft 365 email. For email from MariHost, check your SPF, DKIM and DMARC records.
Not sure which records you need?
Tell us your domain and what you're connecting, and we'll help.
Keep reading
Use Google Workspace or Microsoft 365 email
Keep your email with Google or Microsoft: the records to add and the one setting to change.
Read the guideSPF, DKIM and DMARC: keep email out of spam
What each record does, how to switch on DKIM, and the records to add if your DNS is elsewhere.
Read the guidePoint your domain to MariHost
Nameservers or DNS records: which to use, and how to change them at your registrar.
Read the guide