GuideHow to manage your website's files: the file manager and FTP
Last updated: 29 October 2026
There are two ways to reach your website's files on MariHost: the file manager, and WordPress FTP access with an app. The control panel's file manager works in your browser, with nothing to install: it's quickest for a few files. An FTP app such as FileZilla is better for a whole website or hundreds of files, and it can open wp-config.php, which the file manager doesn't.
Use the file manager
Sign in to your client area at billing.marihost.com, open your hosting plan and click Login to Control Panel. Click Websites in the left sidebar, choose your website, then click Files at the top.
The file manager opens in your website's home folder. Your website itself is in public_html: that's where WordPress and its wp-admin, wp-content and wp-includes folders are. Leave the other files in the home folder as they are: they hold your website's settings for the server, such as its database login.
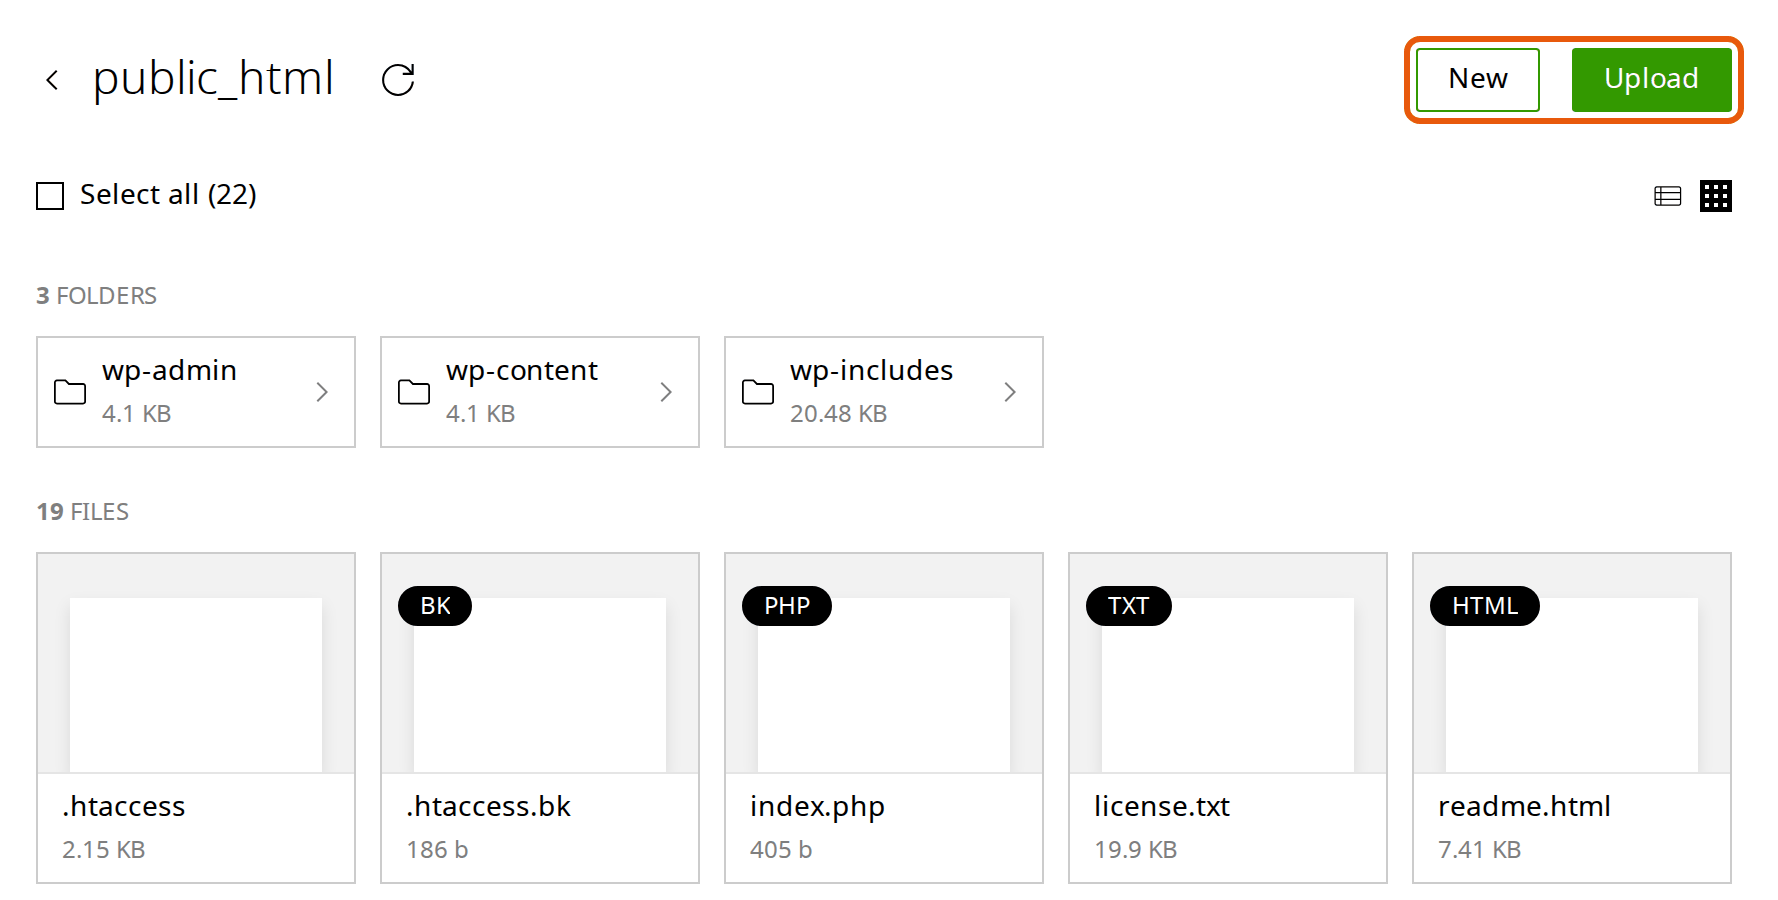
- Upload: open the folder, click Upload and choose File or Folder.
- Make a file or folder: click New, then File or Folder.
- Everything else: right-click a file or folder. You can Edit a file, Download it, Rename or Delete it, Compress files into a zip or Uncompress one, and change Permissions (CHMOD).
- Several at once: select them, and Download, Delete, Cut, Copy and Compress appear at the top.
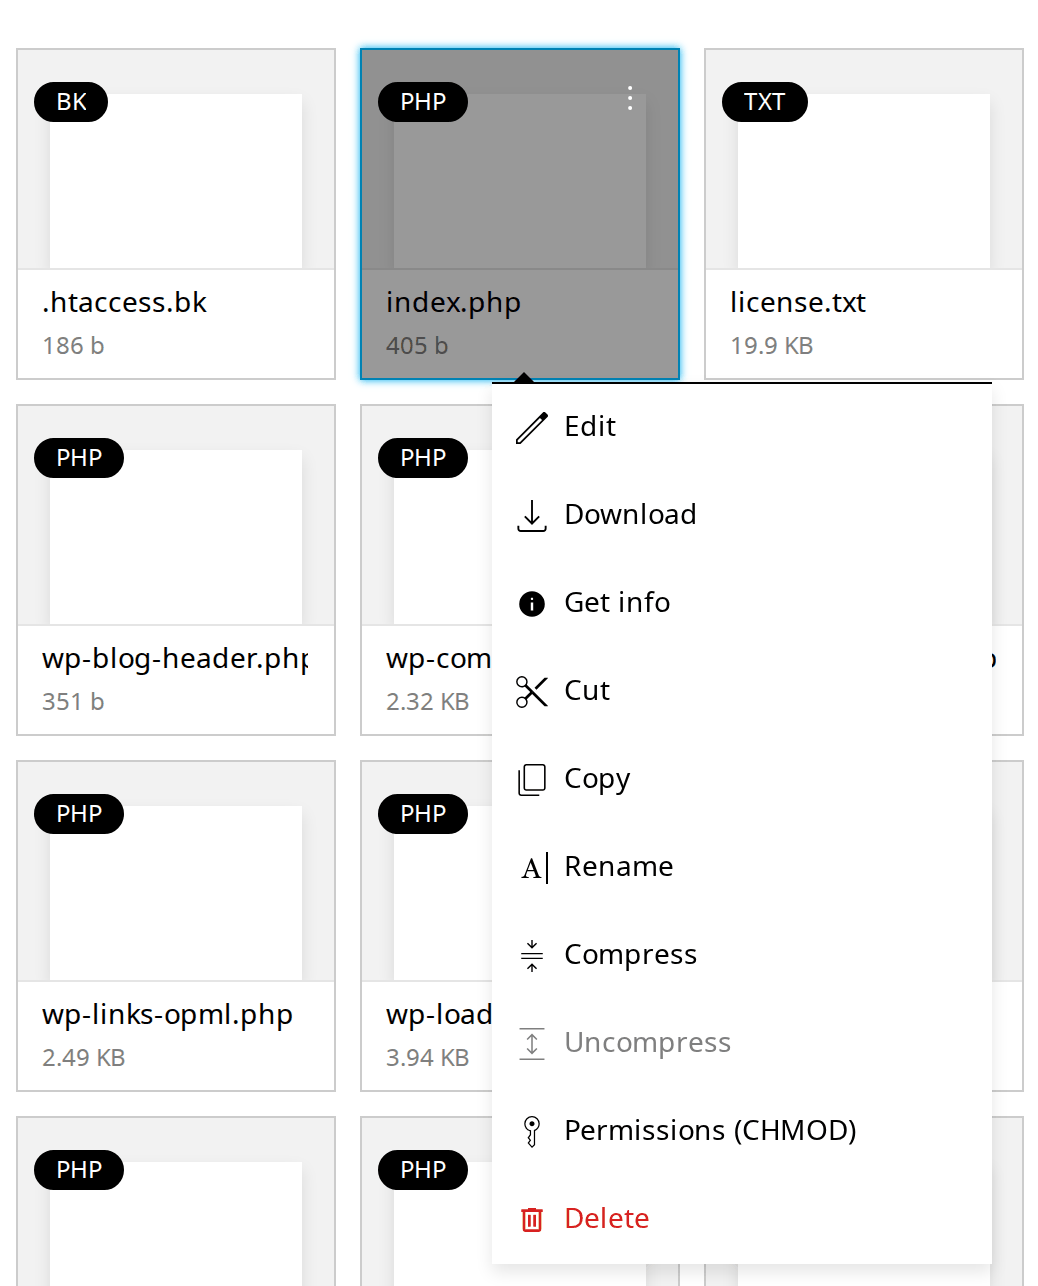
wp-config.php doesn't open here. We keep it out of the file manager to protect your database password: Edit shows an empty editor, so close it without saving. Use FTP instead (below), or a plugin: see Edit wp-config.php.
WordPress FTP access: create an FTP account
Each plan has two FTP accounts for every website it holds: Starter 2, Business 10, Pro 20 and Agency 60.
- On your website's page in the control panel, click Advanced, then FTP.
- Click Add account.
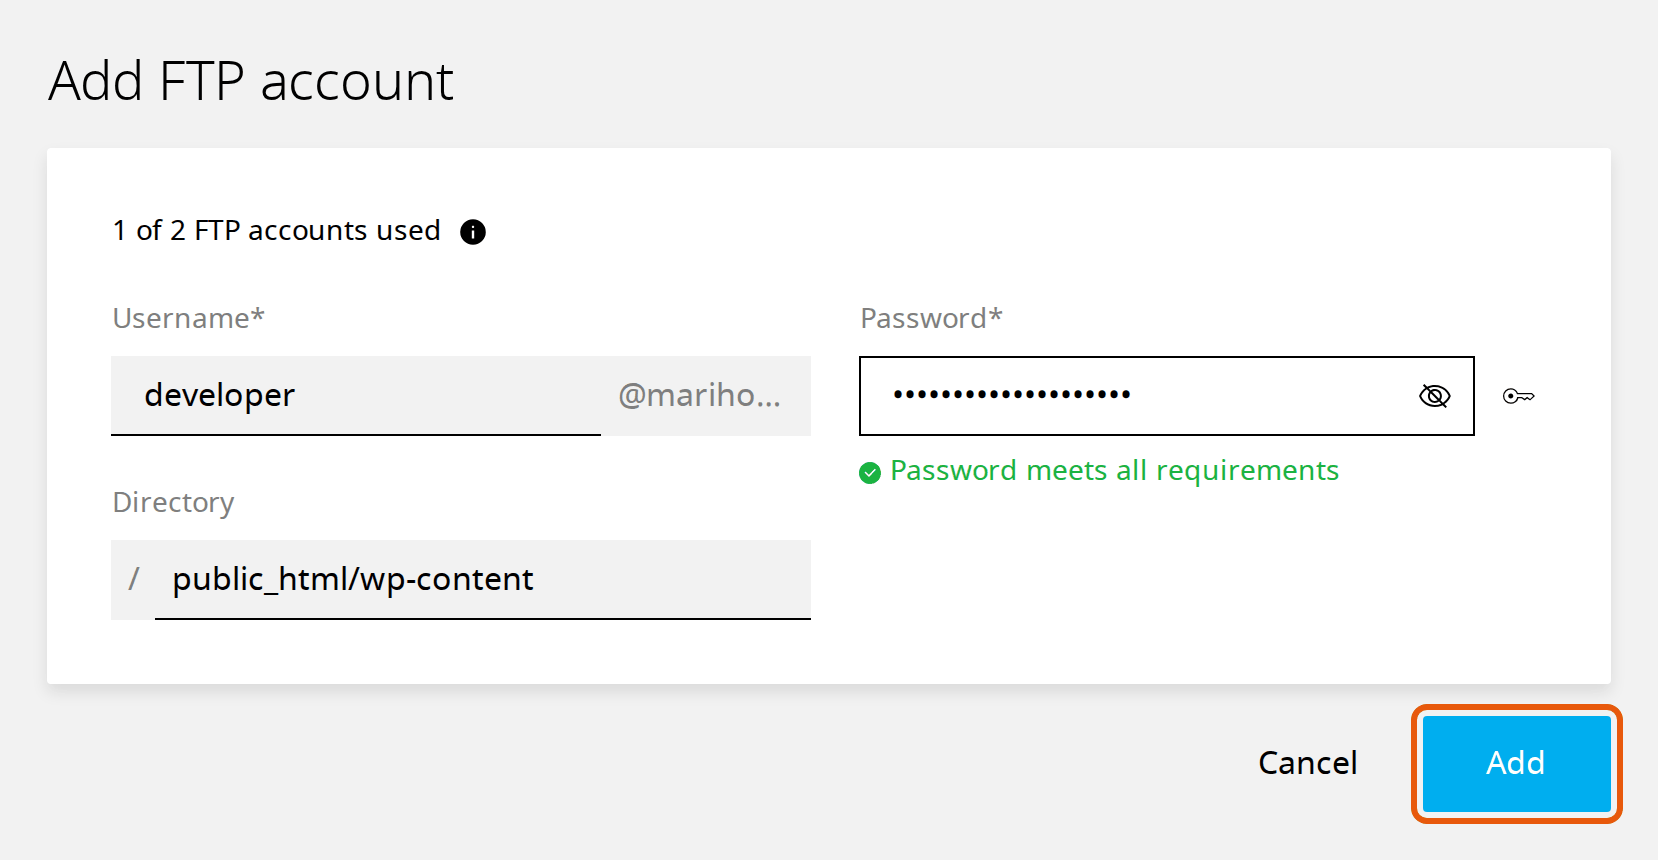
- Username: a name for the person or the job, such as developer. The control panel adds @ and your domain, so the full username is [email protected].
- Directory: the folder this account can reach. Leave it empty for your whole home folder, or type a folder, such as public_html. See Keep FTP accounts safe to choose.
- Password: click the key button to make a strong one, and copy it somewhere safe now. The control panel won't show it again.
- Click Add.
Connect with FileZilla
FileZilla is a free FTP app for Windows, Mac and Linux. Download it from its own website, filezilla-project.org, and if the installer offers you other software, decline it. Other FTP apps, such as WinSCP or Cyberduck, take the same settings.
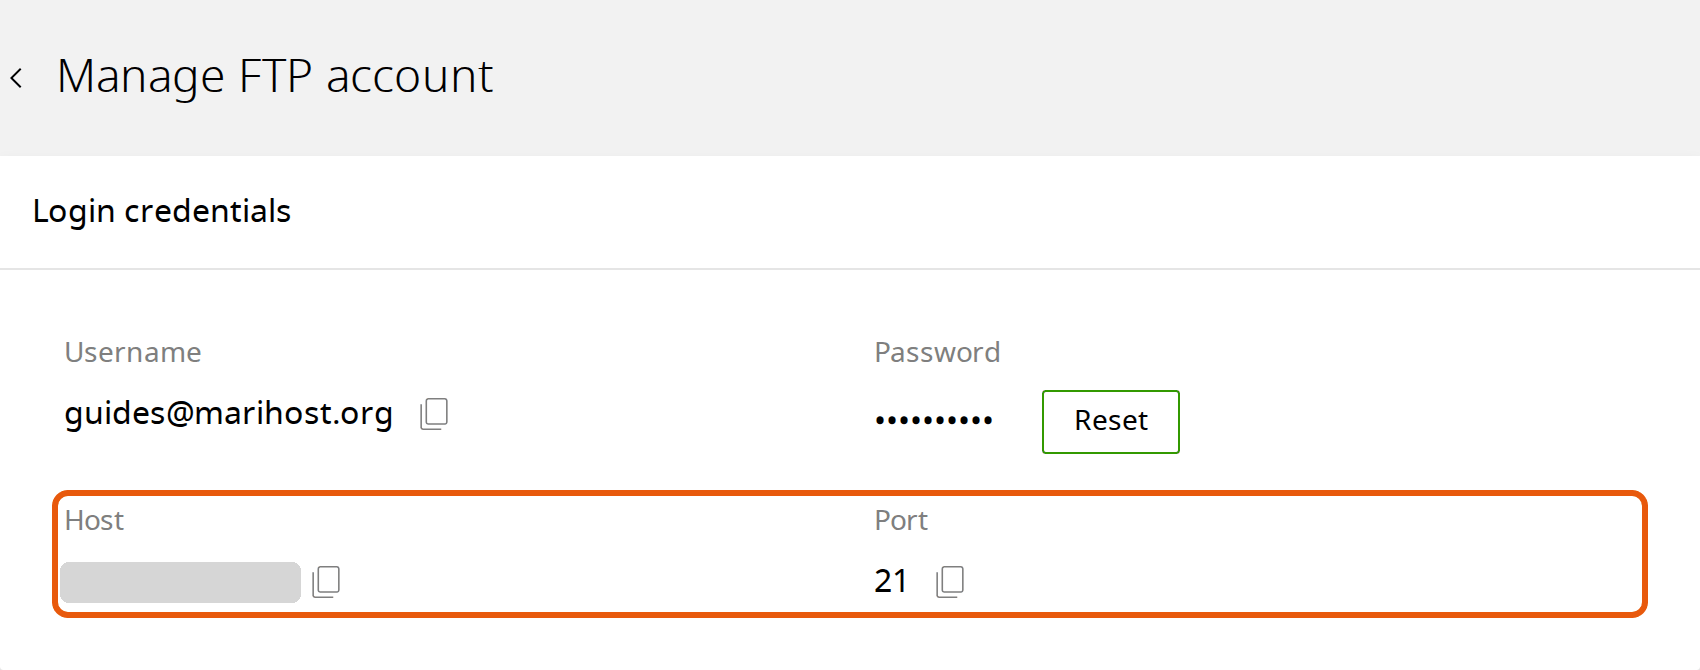
First, find your account's connection details: in Advanced → FTP, click ⋮ next to the account and choose Manage.
In FileZilla, open File → Site Manager, click New site and fill in:
| Setting | Value |
|---|---|
| Protocol | FTP – File Transfer Protocol |
| Host | the Host from Manage: your server's IP address |
| Port | 21 |
| Encryption | Require explicit FTP over TLS |
| Logon Type | Ask for password |
| User | the full username, such as [email protected] |
Click Connect and type the password.
Use the Host from the control panel, not your domain. While you're moving your website to us, your domain still points to your old host, and if your domain goes through Cloudflare's proxy, FTP can't get through it.
The first time, FileZilla asks about our certificate. It shows an Unknown certificate window, because our servers use their own certificate for FTP, issued to pure-ftpd. Tick Always trust this certificate in future sessions and click OK. You need to accept it: if you click Cancel, FileZilla doesn't connect. WinSCP, Cyberduck and other FTP apps ask the same question in their own words, so accept it there too. If FileZilla asks again later for the same server, open a ticket before you connect.
Once you're in, your computer's files are on the left and your website's on the right. Drag files from one side to the other to upload or download them.
If FileZilla can't connect
FileZilla shows what went wrong in the box at the top of its window. The usual messages:
- "421 Sorry, cleartext sessions and weak ciphers are not accepted on this server" (then "Please reconnect using TLS security"): FileZilla tried plain FTP, which our servers refuse because it would send your password unencrypted. In Site Manager, set Encryption to Require explicit FTP over TLS and click Connect again.
- "530 Login authentication failed": the User must be the full username, with @ and your domain, such as [email protected], not just developer. Still failing? Set a new password with Reset on the account's Manage page.
- "Connection timed out" or "Could not connect to server": check that Host is the IP address from Manage, not your domain, and Port is 21. Encryption must be explicit FTP over TLS: implicit FTP over TLS uses a port our servers don't open.
- An "Unknown certificate" window: that's our certificate, and it's expected the first time. Accept it as above.
Windows File Explorer and web browsers can't connect: they don't support FTP over TLS. Use an FTP app such as FileZilla.
Edit wp-config.php over FTP
This also works when your website is down and you can't log in to WordPress. The account needs to reach public_html: its directory is empty or public_html.
- Make a backup. On your website's Backups page, click Backup now. See Back up and restore your website.
- In FileZilla, open public_html and drag wp-config.php to a folder on your computer. Make a copy of it there, such as wp-config-before.php, so you can put it back.
- Open wp-config.php in a plain text editor, such as Notepad on Windows, TextEdit on a Mac or Visual Studio Code. Never use Word: it changes quote marks and adds formatting.
- Add your line above
/* That's all, stop editing! Happy publishing. */and save. Edit wp-config.php has the rules. - Drag the file back into public_html. FileZilla asks what to do with the file already there: choose Overwrite and click OK.
- Open your website in a private browser window to check it.
If your website breaks, upload your copy from step 2 the same way, renamed back to wp-config.php.
Keep FTP accounts safe
An FTP account can change any file it reaches, so treat its password like your control panel's.
Give each account only the folder it needs. One account per person or job, with the smallest folder that does it:
| Directory | The account reaches | Good for |
|---|---|---|
| Empty (/) | Your whole home folder: your website, its logs and its settings files, including the database login | You |
| public_html | Your WordPress files, wp-config.php included, but not the home folder | Moving a website, editing wp-config.php |
| public_html/wp-content | Themes, plugins and uploads only: no wp-config.php and no database password | A developer or designer working on your theme or plugins |
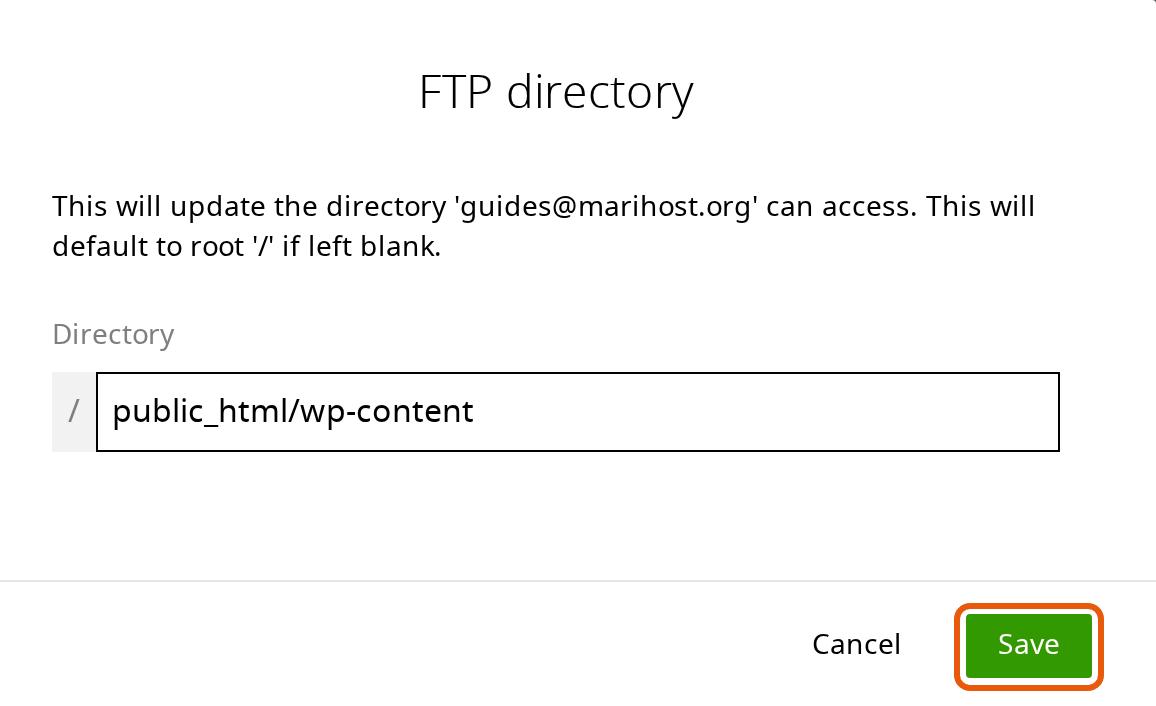
An account can't leave its folder. To change it, open the account's Manage page, click the pencil next to Directory access, type the folder and click Save. The next connection uses the new folder.
- Always choose Require explicit FTP over TLS. Plain FTP sends your password and files unencrypted, so anyone on the same network can read them.
- Use the generated password, and use it nowhere else.
- Don't let your FTP app store the password unprotected. Choose Ask for password, or in FileZilla's Edit → Settings → Interface → Passwords, choose Save passwords protected by a master password. Otherwise anyone who opens your computer can read them.
- Delete accounts you no longer need, such as a developer's when the job is done: click ⋮ next to the account and choose Delete.
- Think someone else has the password? Open the account's Manage page and click Reset.
To give someone their own control panel login for one website instead, see Give someone access to one website.
Next steps
Download a file before you change it, and make a backup before big changes. When a plugin breaks your website, you can switch it off without FTP: see Deactivate a plugin without logging in.
Moving from another host?
We copy your website across for free and check it works before you point your domain.
Keep reading
Edit wp-config.php
Add a setting to WordPress's main settings file safely, and put the file back if something goes wrong.
Read the guideGive someone access to one website
A login of their own for a developer or client, for just the websites they work on.
Read the guideBack up and restore your website
Make a backup before a big change, and put back your whole site or only some files, without a ticket.
Read the guide