GuideWordPress CDN setup: speed up your site with MariCDN
Last updated: 26 October 2026
Every new WordPress website at MariHost comes with the MariCDN by MariHost plugin. MariCDN is our own CDN (content delivery network): it serves your images, CSS, JavaScript and fonts from servers around the world, so your pages load faster for visitors far from our servers in Singapore. It also takes much of that traffic off your hosting plan. Its free plan includes 3 GB a month. This guide connects the plugin in four steps, and nothing changes for your visitors until the last one. It takes about 10 minutes.
Before you start
- A MariCDN plan. Sign up at maricdn.com: the free plan is enough to start, and needs no card. Your connection key comes in your welcome email.
- The MariCDN plugin. It's already installed on every new WordPress website at MariHost: look for MariCDN in WordPress's left menu. Installed WordPress yourself, or moved your site to us? Go to Plugins → Add Plugin, search for "MariCDN", then install and activate MariCDN by MariHost.
Connect your plan
1. Paste your connection key
Log in to WordPress (the Admin button on your website's page in the control panel signs you straight in) and click MariCDN in the left menu. Settings opens with the four steps. Paste your key under Connection key and click Connect.
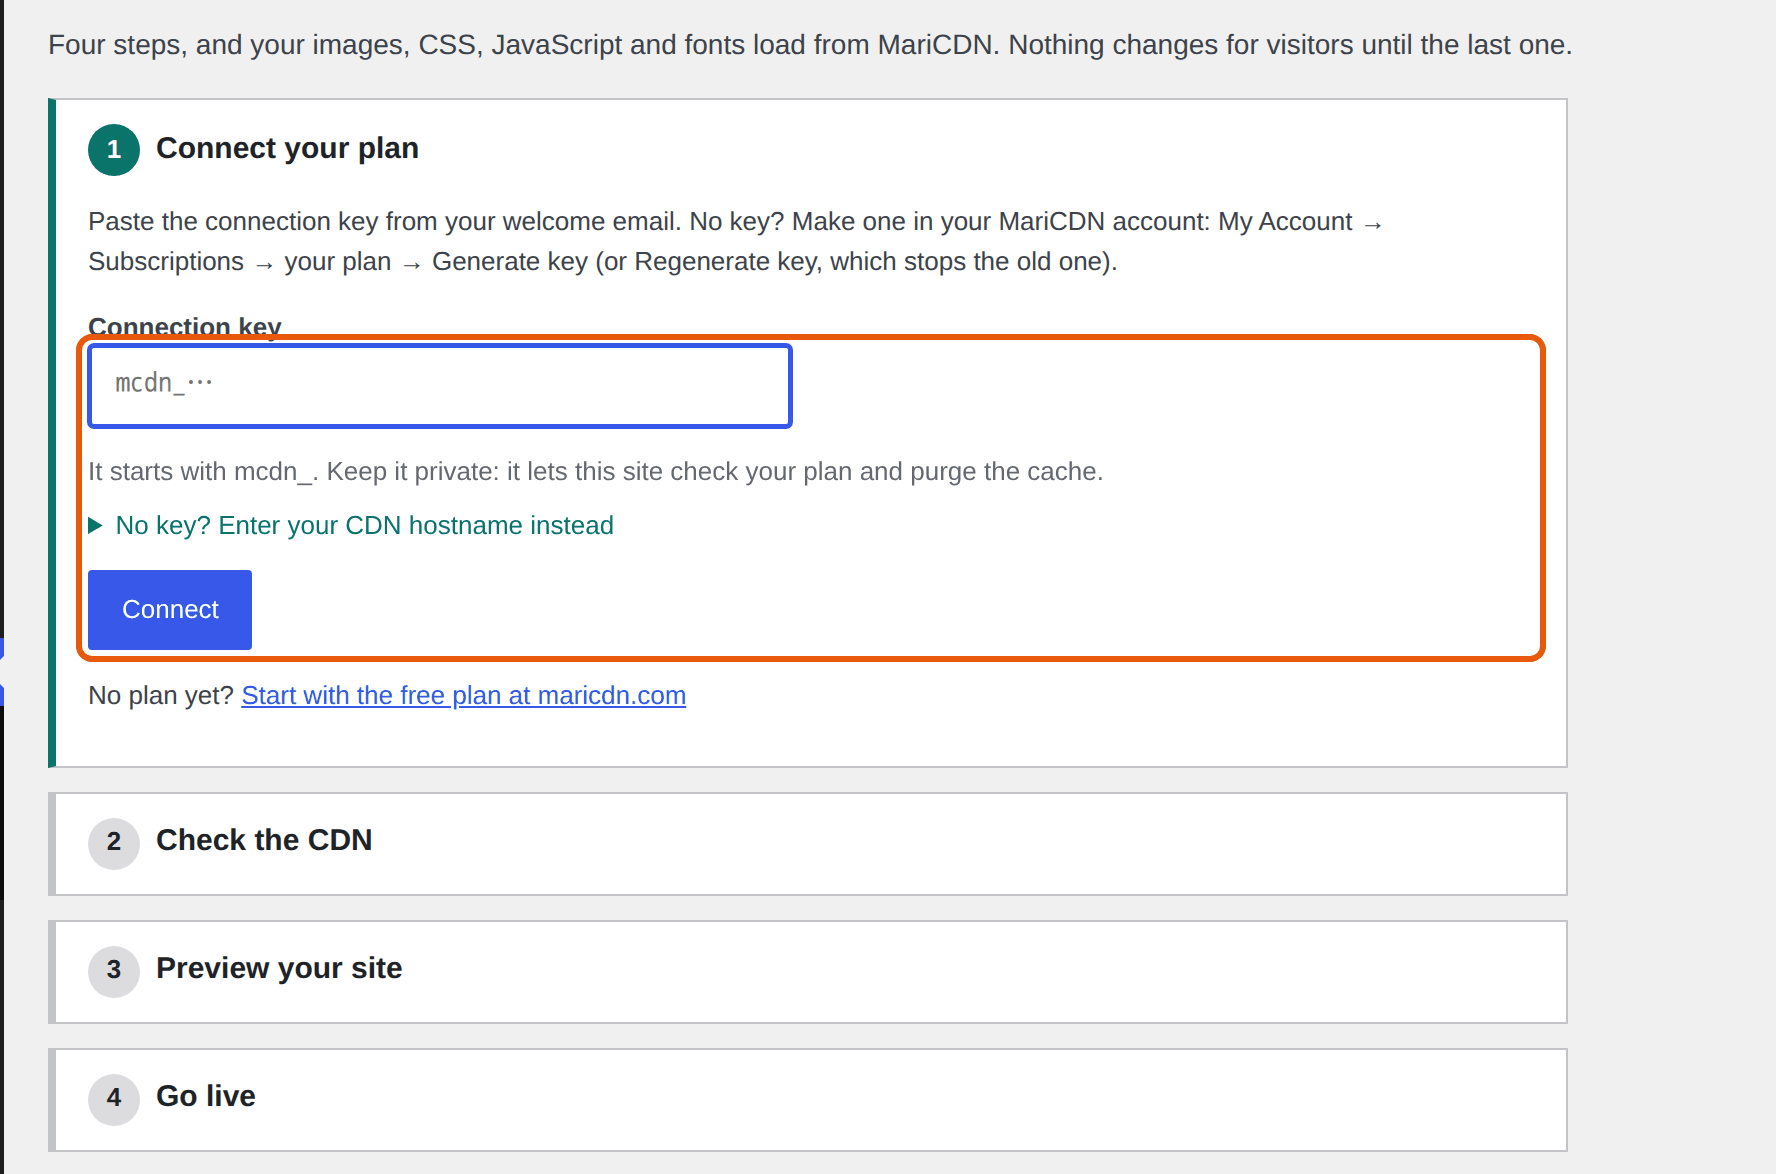
The key starts with mcdn_. Keep it private, like a password: it lets your site check your plan and clear the CDN's cache. No key? Log in to your MariCDN account, go to My Account → Subscriptions, open your plan and click Generate key. Regenerate key makes a new one and stops the old one at once.
2. Let the plugin check the CDN
The plugin connects, shows your CDN hostname, such as yoursite.maricdn.net, and checks that the CDN can fetch your site's files. When Check the CDN shows Done and "The CDN serves your site's files", click Turn on Preview.
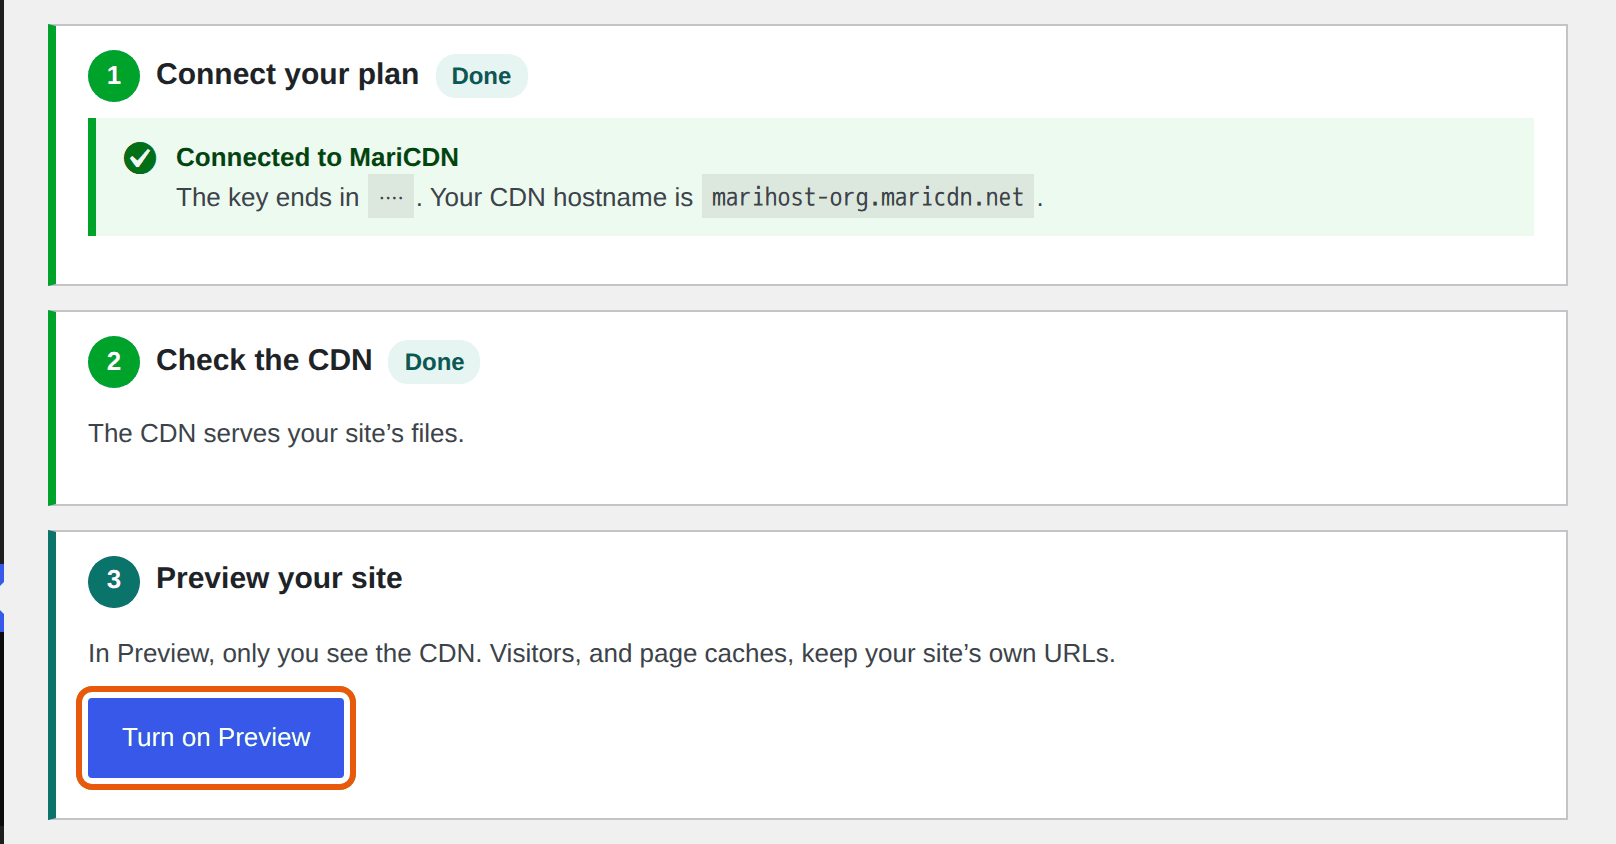
Preview your site
In Preview, only you see your site through the CDN. Visitors, and page caches, keep getting your site's own addresses. The admin bar at the top of WordPress shows MariCDN: Preview.
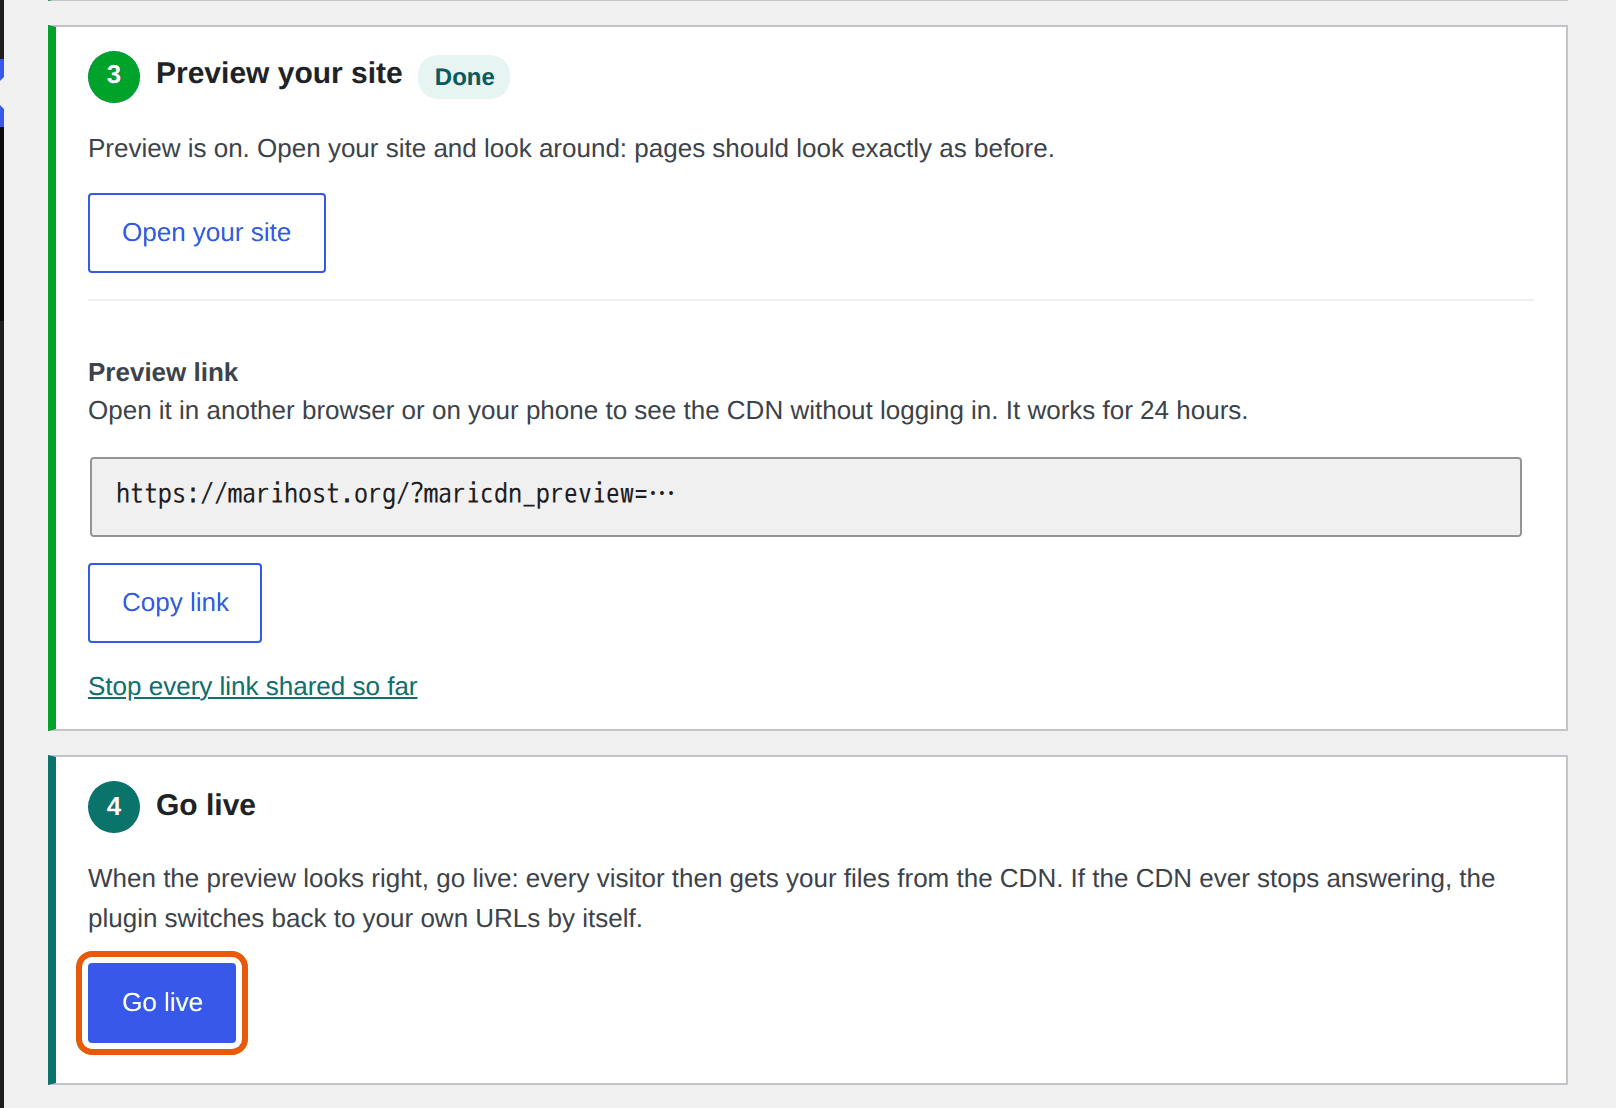
Click Open your site and look around a few pages: they should look exactly as before, with every image, font and style in place. To check on your phone, or in a browser where you're not logged in, click Copy link and open the Preview link there. It works for 24 hours. Stop every link shared so far cancels the links you've sent.
Go live with your WordPress CDN
When your pages look right, click Go live.
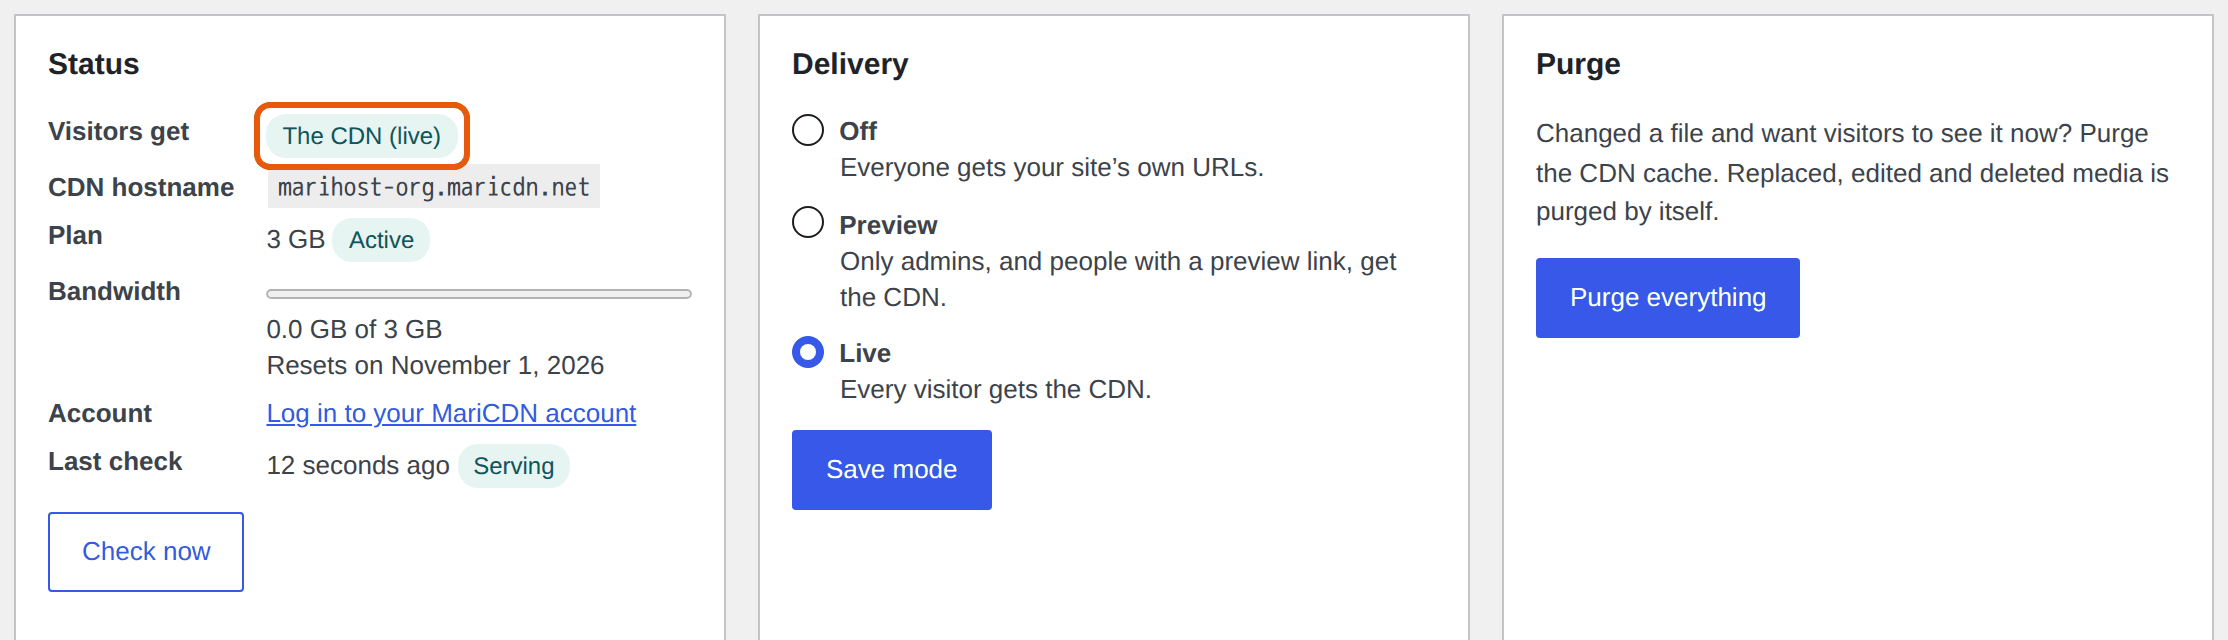
Every visitor now gets your images, CSS, JavaScript and fonts from the CDN. The plugin also clears LiteSpeed Cache's copies of your pages, so visitors get the change at once. MariCDN → Settings now shows your status: Visitors get says The CDN (live), with your plan and the bandwidth used this month. The admin bar shows MariCDN: Live.
Want to see it for yourself? Open your site in a private window, right-click an image and open it in a new tab: its address starts with your CDN hostname.
If the CDN ever stops answering, or your plan is paused or runs out of bandwidth, the plugin switches your site back to its own addresses by itself, and back to the CDN when it recovers. Your site keeps working either way. The plugin checks every 15 minutes.
Clear the CDN cache
The CDN keeps copies of your files. You rarely need to clear them: media you replace, edit or delete is cleared by itself, and so is everything after theme, plugin and WordPress updates.
If you change a file and visitors still see the old one, click Purge everything under MariCDN → Settings. Or, from the admin bar, open the MariCDN menu and choose Purge CDN cache.
With Cloudflare or LiteSpeed Cache
LiteSpeed Cache: MariCDN does the CDN work itself, so leave LiteSpeed Cache's own CDN setting off. See LiteSpeed Cache settings.
Cloudflare: MariCDN works with Cloudflare's proxy on your domain, with nothing to add in Cloudflare. But Cloudflare's "I'm Under Attack" mode, Bot Fight Mode, strict firewall rules or country blocks can stop MariCDN fetching your files: relax them for /wp-content/ and /wp-includes/. After replacing a file under the same name, purge Cloudflare's cache first, then MariCDN's.
If something's not right
The key doesn't connect. Copy it again in full, from mcdn_ to the end, with no spaces. Still no luck? Make a new key in your MariCDN account (Regenerate key), and paste it in.
Something looks wrong in Preview. Don't go live yet. If you use Cloudflare, check its security settings above. Otherwise, contact MariCDN from MariCDN → Help, and include the details from MariCDN → Settings → Tools → Copy diagnostics: they have no keys or passwords.
Your site uses its own addresses again. The CDN didn't answer, or your plan is paused or out of bandwidth. Your site keeps working, and the CDN comes back by itself. MariCDN → Settings says why.
You've used your 3 GB. Your site keeps working from its own addresses until the bandwidth resets: Status shows the date. Need more? Choose a bigger plan in your MariCDN account. The free plan is for sites that use it: if yours delivers almost nothing for a while, MariCDN emails you a link to keep it. See MariCDN's pricing.
You want to turn it off. Under Delivery, choose Off and click Save mode. Everyone gets your site's own addresses again.
Next steps
See your CDN traffic under MariCDN → Stats, from the day after you go live. Want your pages faster too? See LiteSpeed Cache settings for opcode caching and Redis.
Want your site faster for visitors abroad?
Start on MariCDN's free plan: 3 GB a month, no card needed, and the plugin's already on your WordPress.
Keep reading
LiteSpeed Cache settings
The settings we recommend: the page cache, opcode caching and Redis for faster dashboards and shops, and a CDN.
Read the guideUse Cloudflare with your website
Move your DNS to Cloudflare's free plan without breaking your email, and set HTTPS up the right way.
Read the guideStart a WordPress website
From choosing a domain to publishing your first page, step by step.
Read the guide