GuideHow to make a WordPress staging site and push it live
Last updated: 25 October 2026
A staging site is a private copy of your website where you can try updates, a new theme or a redesign without your visitors seeing anything. When you're happy, you push the changes to your live website in one step. Every MariHost plan includes a staging copy for each of its websites. Making one takes a few minutes; this guide shows you how, how to work on it, and how to push it live safely.
What a staging copy is
- A full copy of your website: its files and its database, so WordPress, your theme, plugins, pages and settings.
- At its own address, ending in .marihost.dev, such as yourbusiness.marihost.dev, with HTTPS.
- Hidden from search engines, so the copy never competes with your real site in Google.
- Free on every plan: one staging copy for each website your plan holds, and it doesn't count as one of your websites. Its files use your plan's storage.
A staging copy can't have its own domain or email. It's for testing, not a second live site.
Make a WordPress staging site
1. Choose Staging website and Clone a website
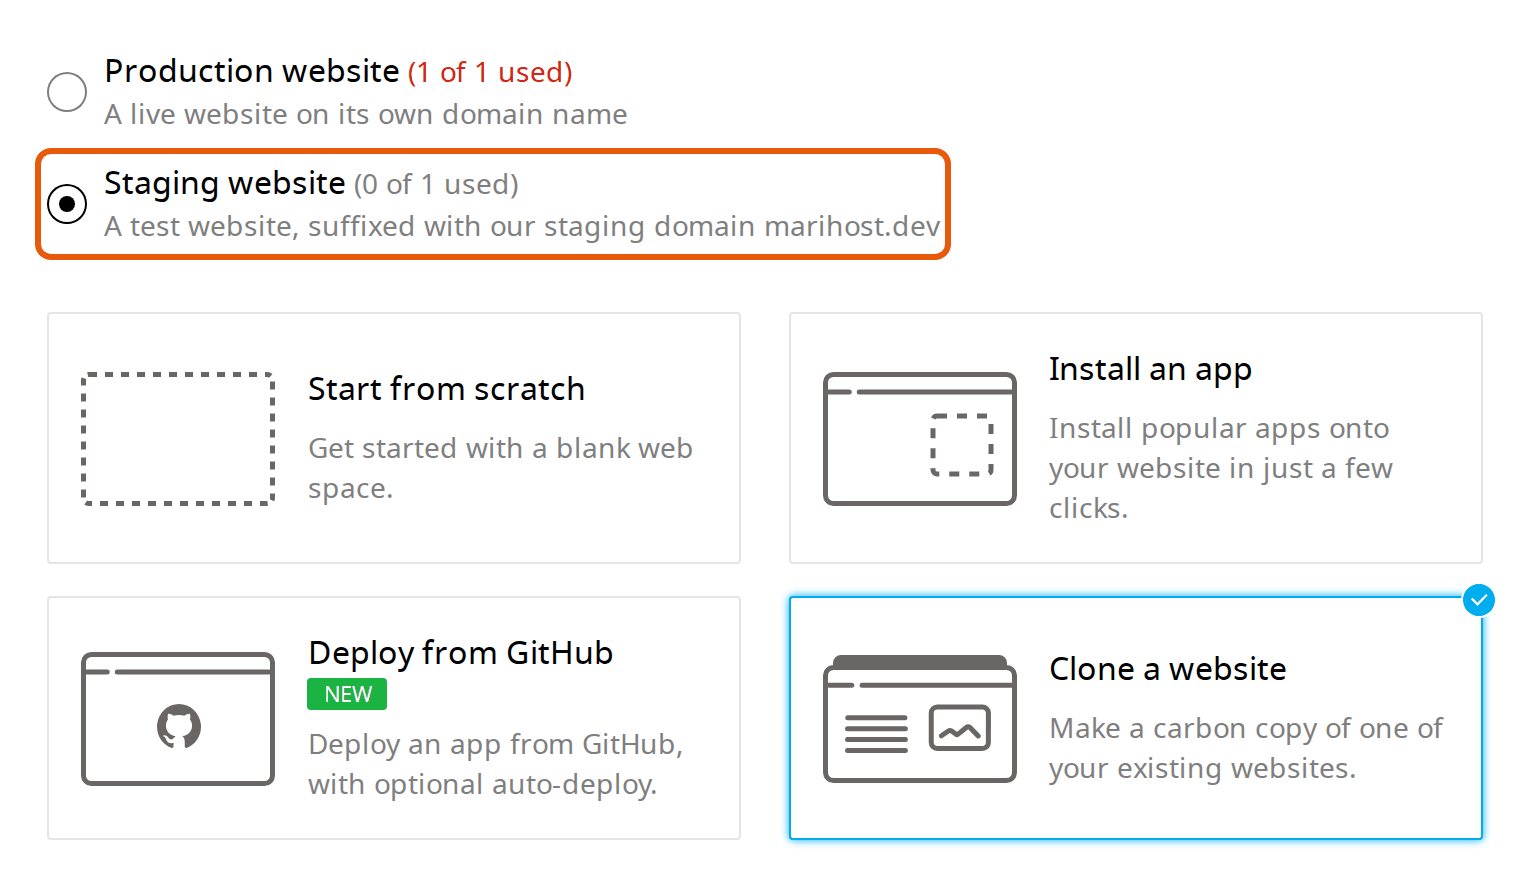
Sign in to your client area at billing.marihost.com, open your hosting plan and click Login to Control Panel. Open Websites in the left sidebar and click Add website. At the top, choose Staging website, then choose Clone a website.
2. Name the copy and choose the website
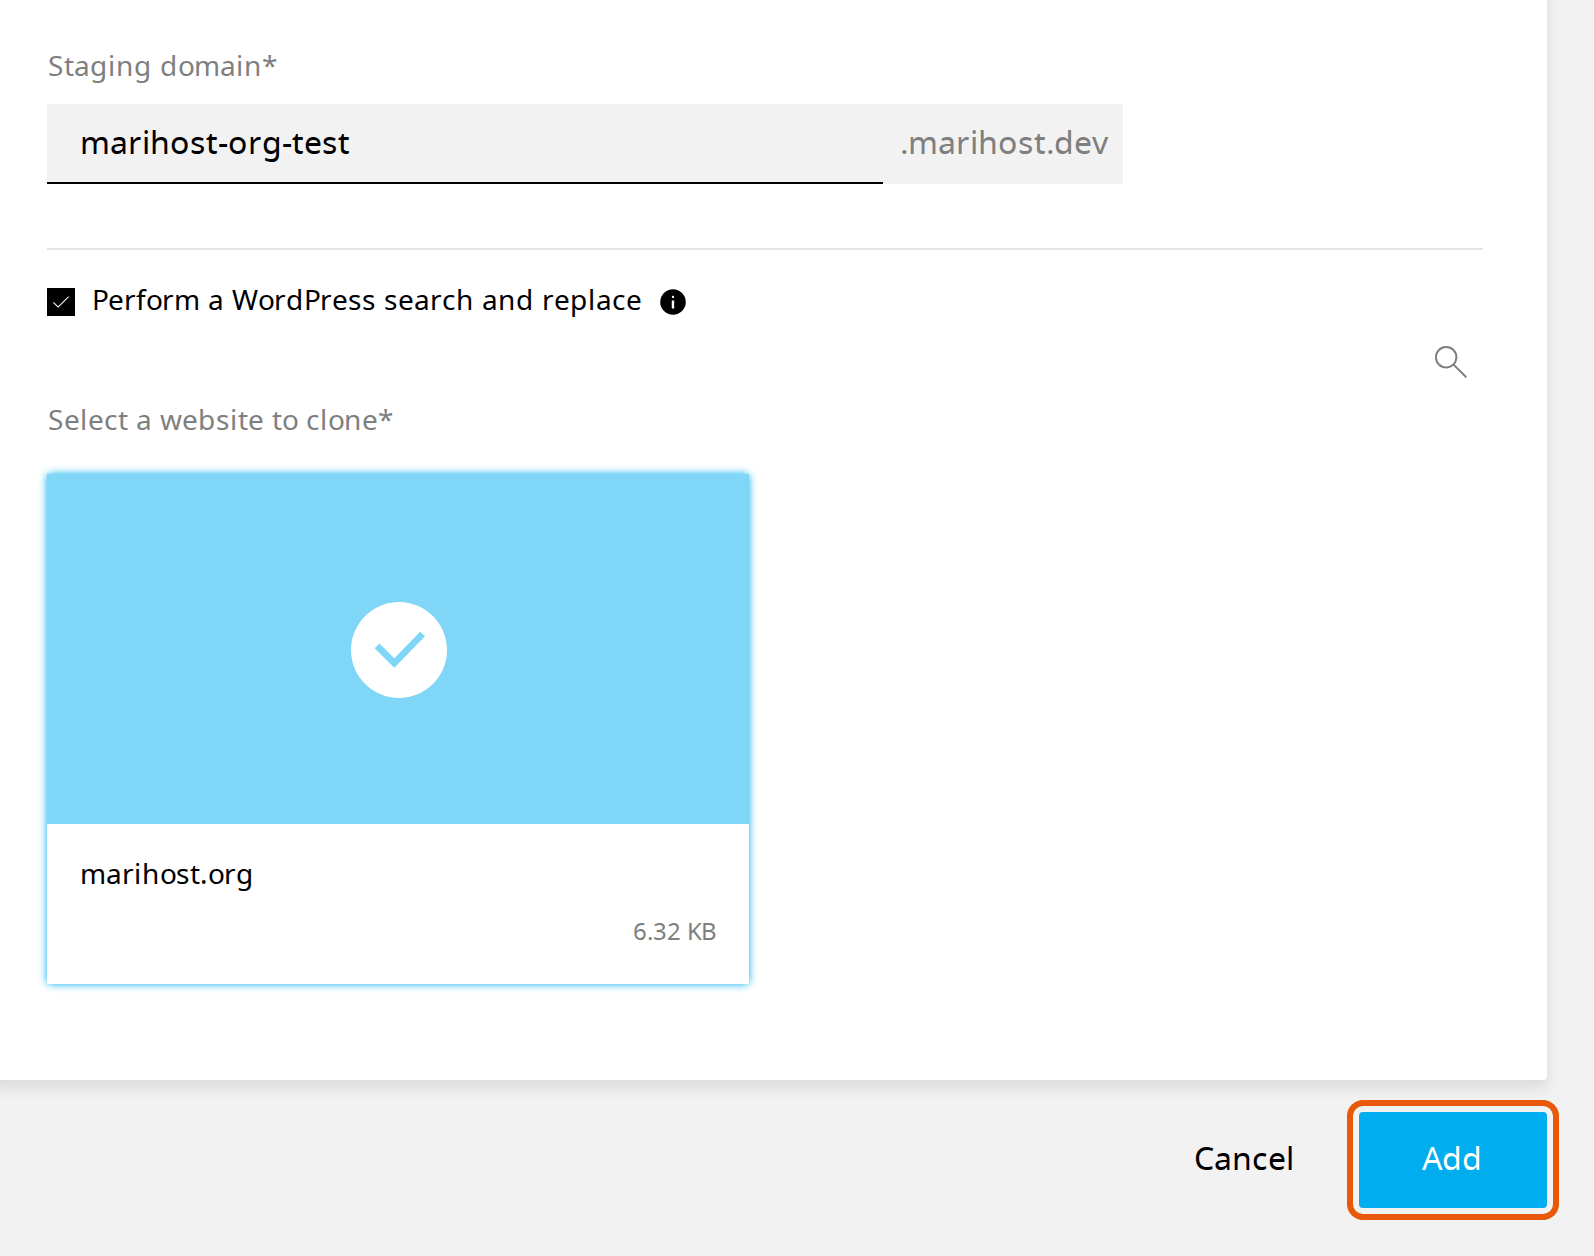
Under Staging domain, type a short name for the copy: it becomes its address, followed by .marihost.dev. Leave Perform a WordPress search and replace ticked, so the copy's links point to its own address, not your live site. Under Select a website to clone, click your website, then click Add.
The control panel ticks off each step as it copies your site, and shows "Website clone done" when it's finished, usually within a few minutes. Click Manage website to open the copy.
3. Find your copy
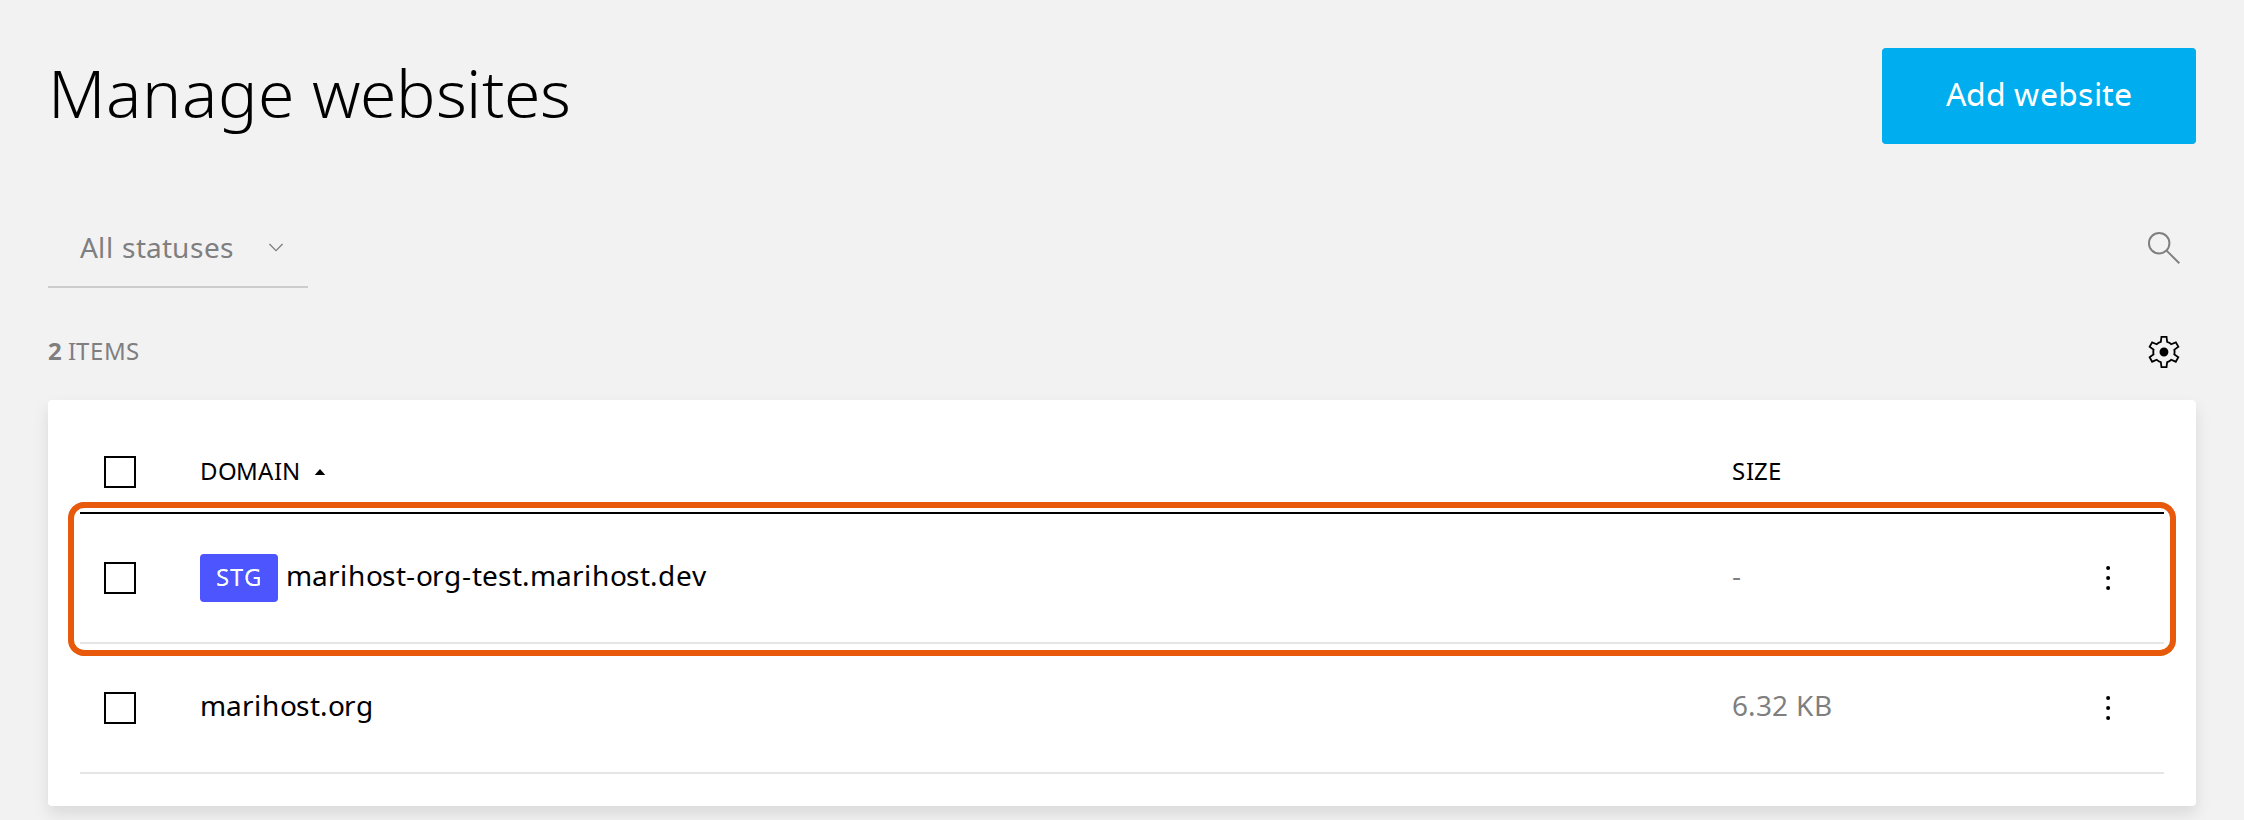
Your staging copy is in Websites, with an STG label next to its address.
Work on the copy
Open the staging copy from Websites and click Admin next to WordPress, as on your live site. Then make your changes: update plugins, try a new theme, change your PHP version, rework your pages.
Check the copy as you go, at its .marihost.dev address. Anything you do there stays there: your live site doesn't change until you push.
Meanwhile, your live site carries on. If it takes orders, bookings or comments, keep that in mind: when you push the database, the live site's database is replaced by the copy's (see below).
Push your changes live
Before you push, make a backup of your live website, so you can go back if something isn't right: see Back up and restore your website.
1. Choose where to push
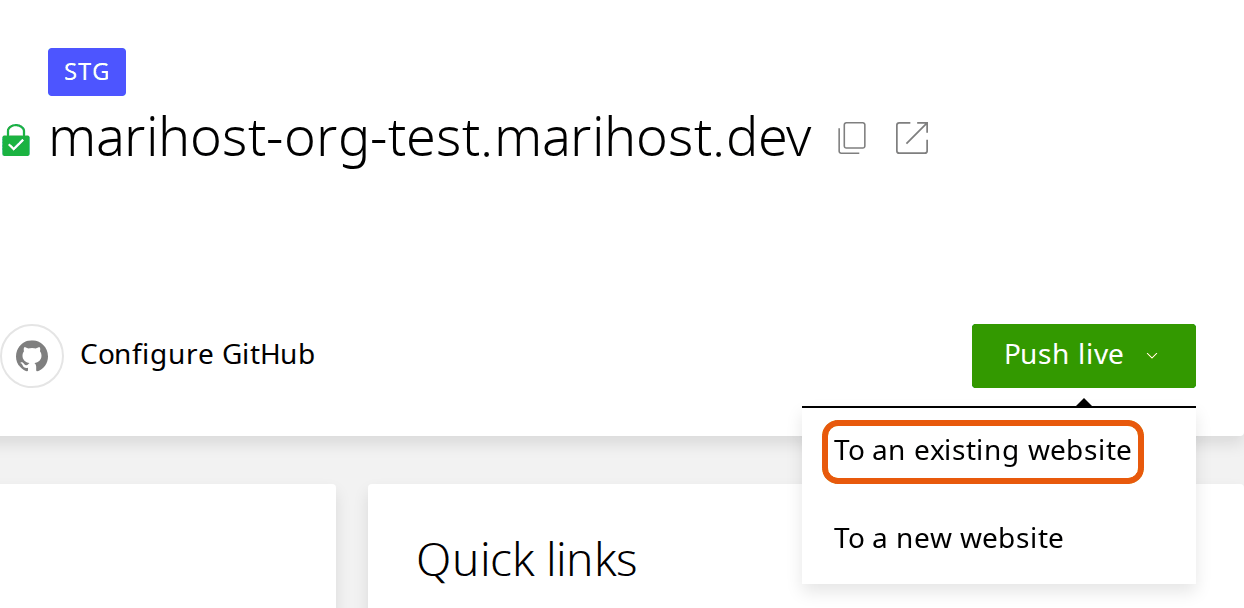
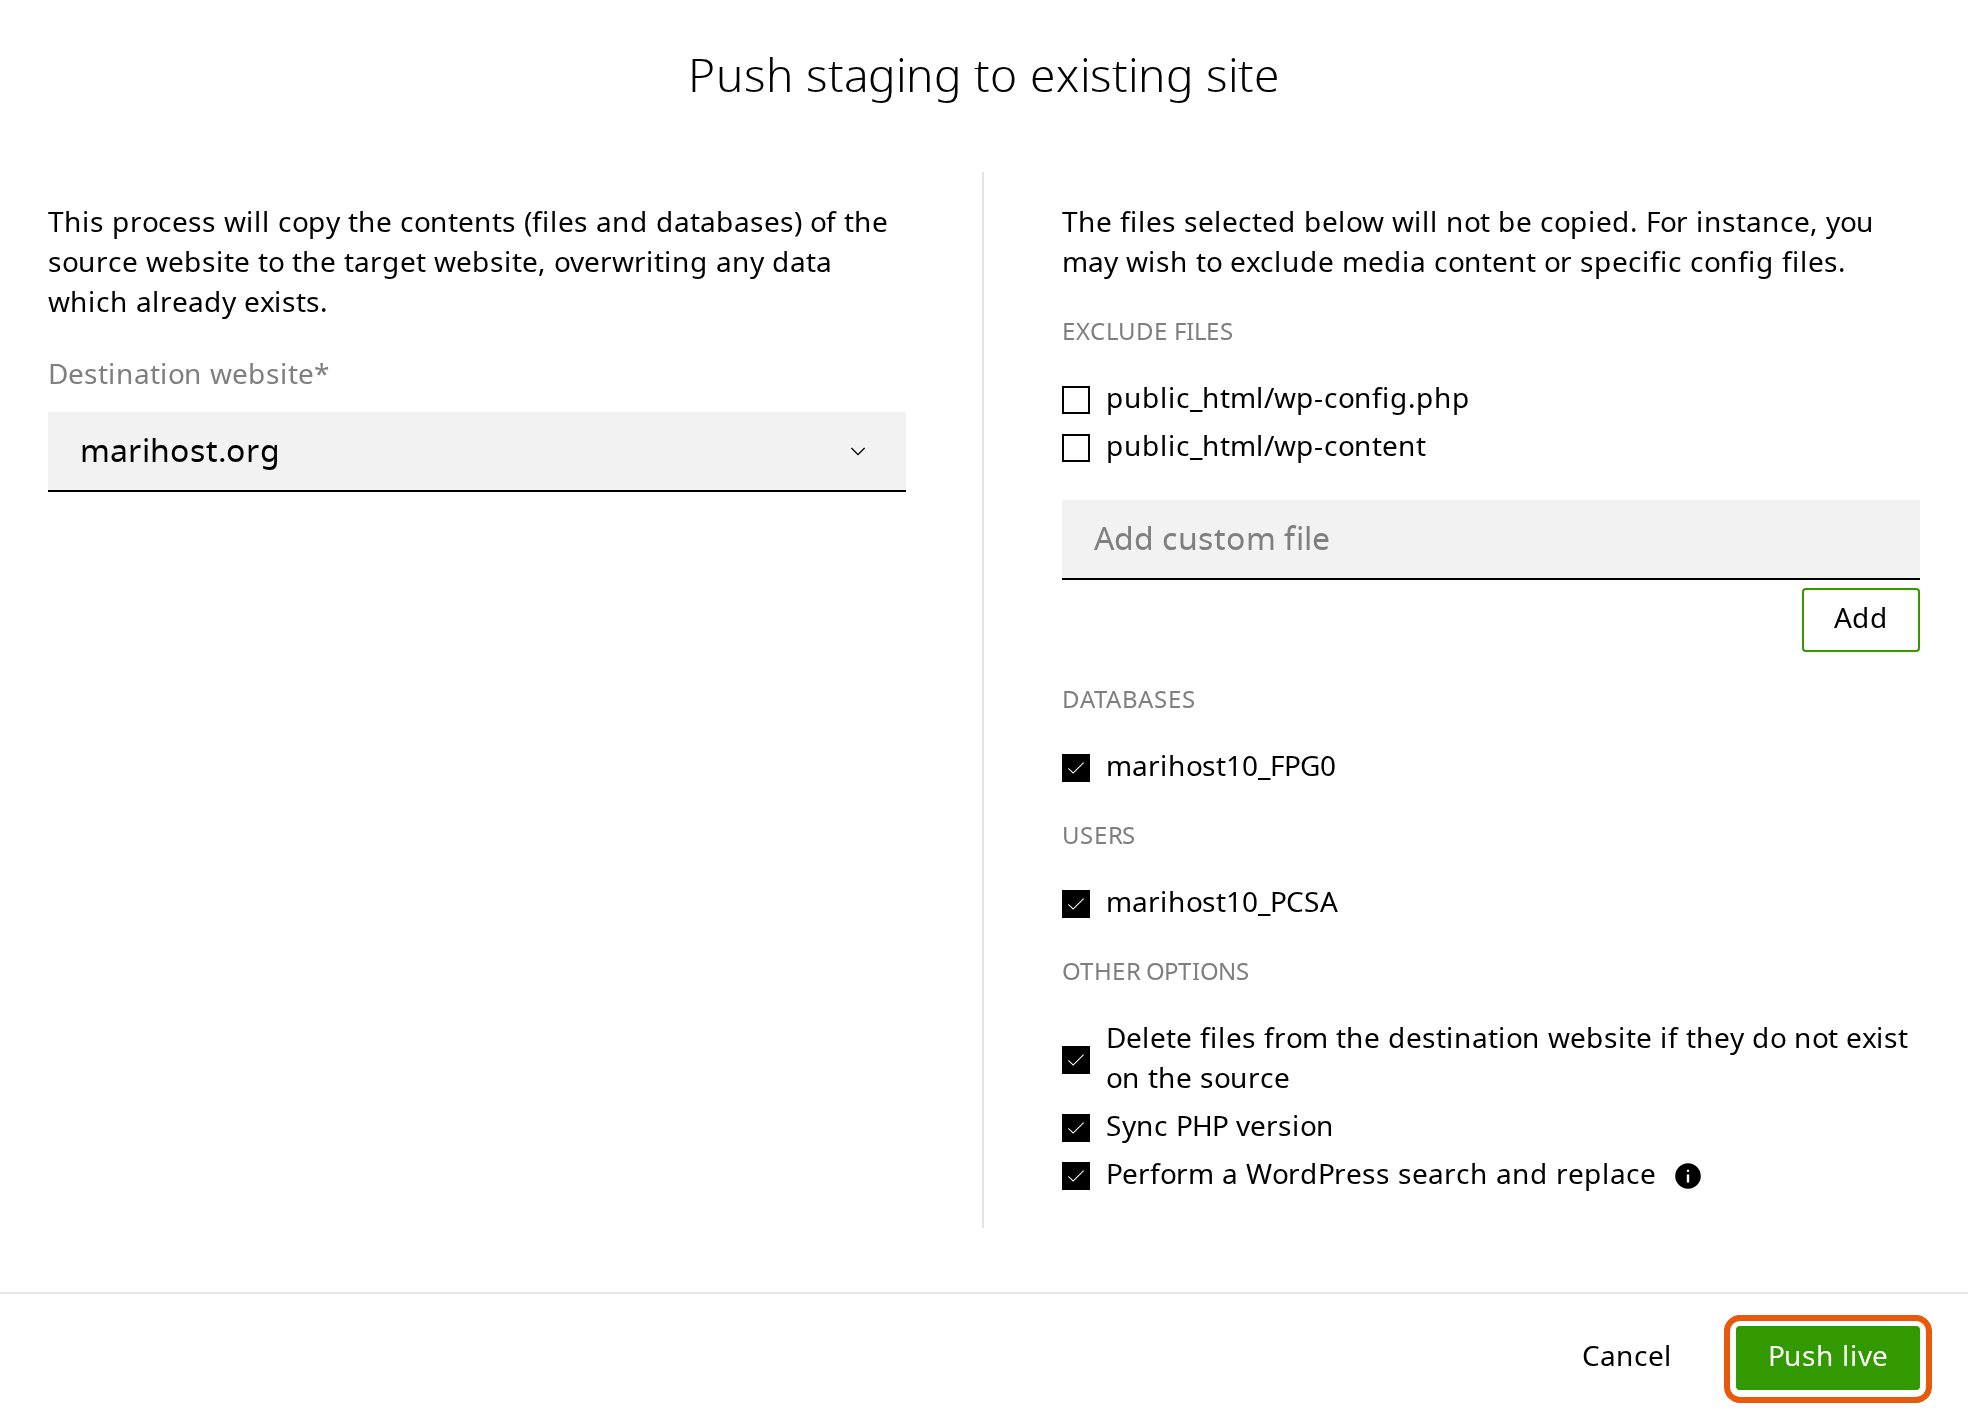
Open the staging copy from Websites. Click Push live and choose To an existing website.
2. Check the options and push
Under Destination website, choose your live website. The control panel copies the copy's files and database over it. The options on the right decide what goes:
- Exclude files: tick anything you don't want copied, such as public_html/wp-content to keep the live site's uploads and plugins as they are. Leave it all unticked to copy everything.
- Databases: your WordPress content and settings. Untick it to push only files, but most changes made in WordPress, such as pages, menus and theme settings, are in the database.
- Delete files from the destination website if they do not exist on the source, Sync PHP version and Perform a WordPress search and replace: leave them ticked, so the live site ends up exactly like the copy, at its own address.
Click Push live.
The control panel ticks off each step again and shows "Website clone done" when it's finished, usually within a minute. Your staging copy stays, so you can keep using it for the next change.
3. Check your live site
Open your live site, log in to WordPress and check the pages you changed. Then clear the page cache, so visitors get the new pages: click the LiteSpeed Cache icon in WordPress's top bar and choose Purge All.
If something's not right
The live site broke after the push. Restore the backup you made before pushing: Backups → Restore → Full website.
Orders, bookings or comments from the last few days are missing. They were on the live site after you made the copy, and the push replaced the database. Restore the backup from before the push, then make your changes on the live site, or push again without the database.
The staging copy shows your live site's address in its links. Make a new copy with Perform a WordPress search and replace ticked.
You can't choose Staging website. Each website on your plan can have one staging copy, and they're all in use. Delete a copy you no longer need, or ask us.
Stuck? Open a ticket with the staging address and your live website, and we'll help.
Next steps
Test your next PHP upgrade on a staging copy first: see Change your PHP version. Would you rather we tested updates for you? On WordPress Care Premium, we try updates on a staging copy before they reach your live site.
Want a hand with your first staging copy?
Tell us your website, and we'll walk you through it.
Keep reading
Back up and restore your website
Make a backup before a big change, and put back your whole site or only some files, without a ticket.
Read the guideChange your PHP version
Pick the right version for WordPress, check your site first, and switch back if a plugin complains.
Read the guideStart a WordPress website
From choosing a domain to publishing your first page, step by step.
Read the guide