GuideHow to turn on OPcache and the Redis object cache for WordPress
Last updated: 29 October 2026
Two switches in the control panel make WordPress faster, and both are off on a new website: opcode caching (PHP's OPcache) and Redis. Both come with your hosting. This guide explains what each one does, how to turn it on and check it works, and how to keep Redis to a sensible size. It takes about 10 minutes.
What they do
LiteSpeed Cache, which comes with every new WordPress website, already keeps ready-made copies of your pages for visitors. But some pages are built fresh every time: your shop's cart and checkout, members' areas, the WordPress dashboard, and every page for someone who's logged in. These two make building them faster.
- Opcode caching keeps WordPress's code ready to run. WordPress is hundreds of PHP files, and without it PHP reads and prepares each one again for every page it builds. With it, PHP keeps them prepared in memory. It helps every website, and there's nothing to set up in WordPress.
- Redis keeps WordPress's database answers in memory. WordPress asks its database the same questions again and again, for settings, menus and products. With Redis, it asks once and keeps the answer. It helps shops, membership sites and busy websites most, and WordPress connects to it through LiteSpeed Cache.
Turn on opcode caching
- In the control panel, open Websites in the left sidebar and choose your website.
- Click Advanced at the top, then Optimization.
- Turn the Opcode caching switch on. A notice says "'Opcode caching' enabled".
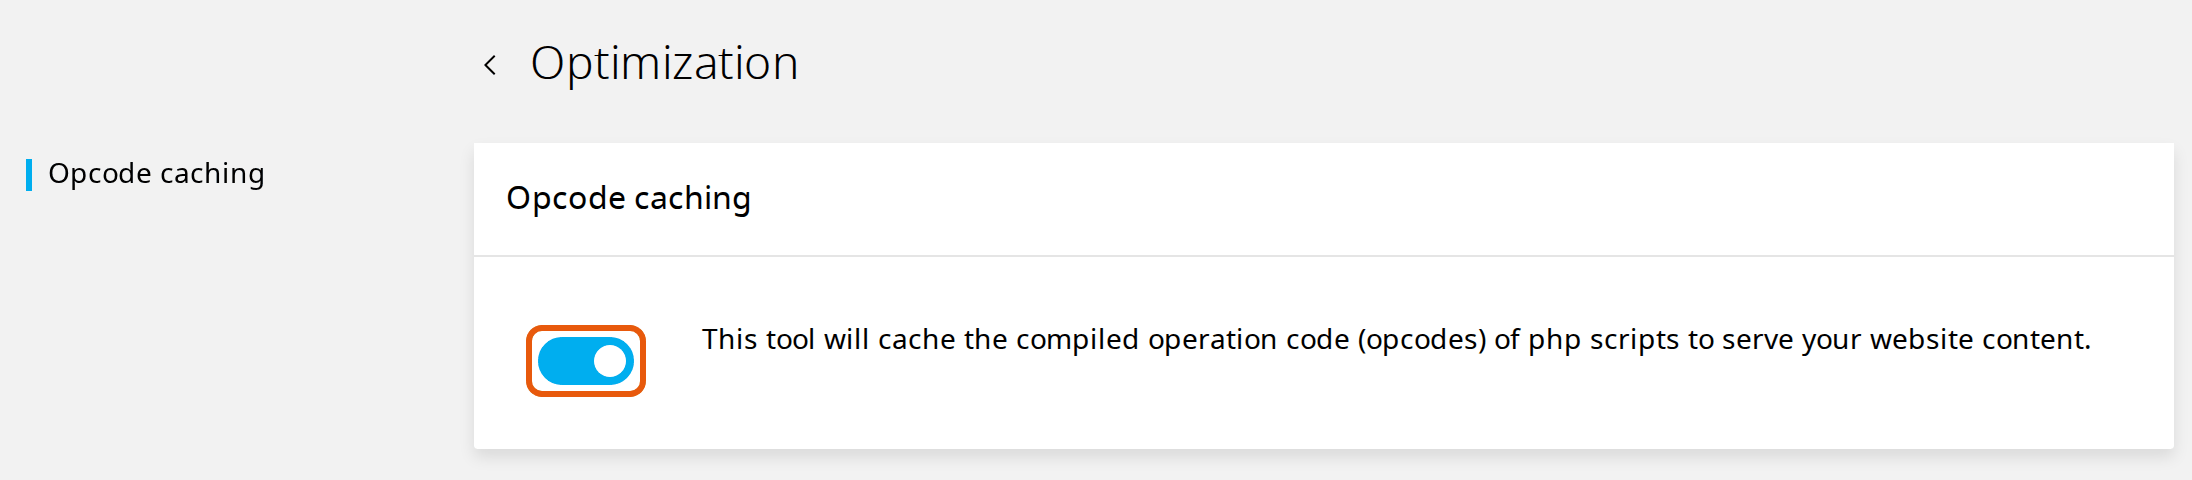
It works straight away. Files you change, over FTP or with a plugin, are picked up on the next visit, so you don't need to clear anything after an edit.
The switch adds opcache.enable to your php.ini directives (Developer tools → php.ini editor). Use the switch to turn it on or off, rather than changing that line.
Turn on the Redis object cache
- On your website's page, click Advanced, then Developer tools.
- Click Redis in the list on the left.
- Turn the Redis switch on. A notice says "Redis enabled".
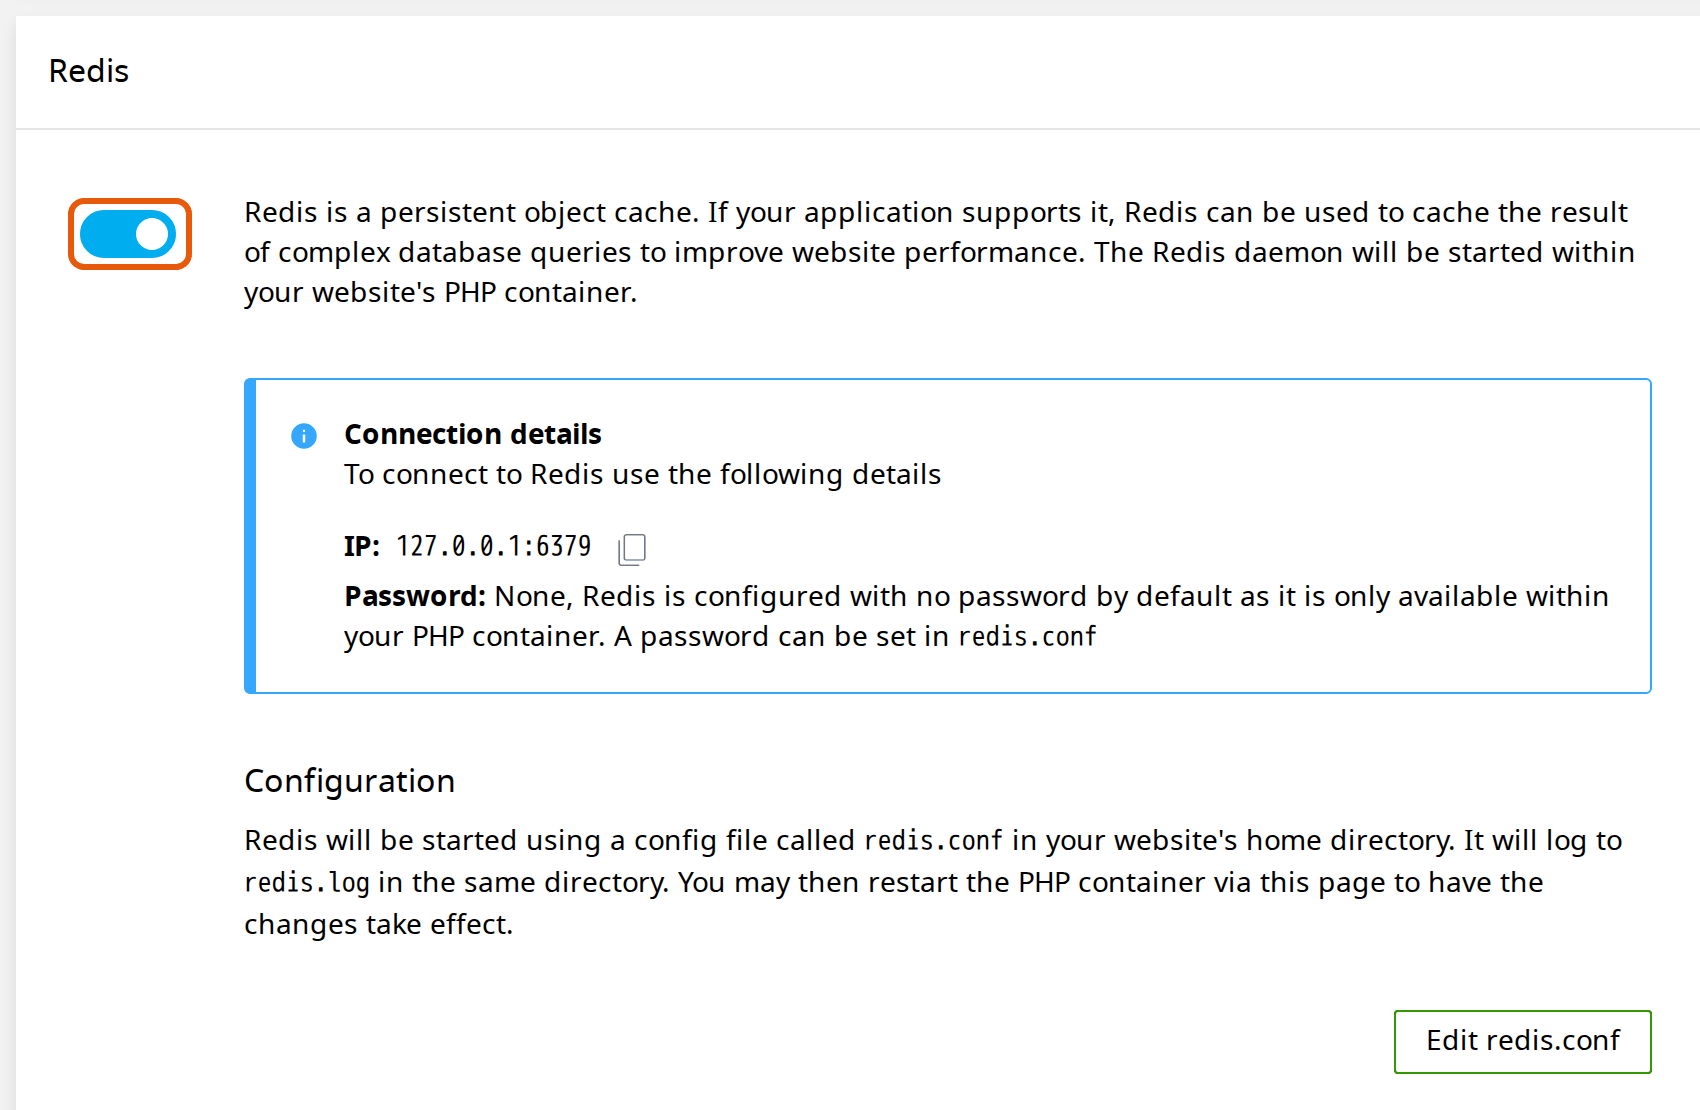
Connection details show the address, 127.0.0.1, and the port, 6379, with no password. Redis runs inside your website's own space on the server, so only your website can reach it. Each website has its own: turn it on for each website you want it on.
Connect WordPress to Redis
- Log in to WordPress. The Admin button on your website's page in the control panel signs you straight in.
- Go to LiteSpeed Cache → Cache and open the Object tab.
- Set Object Cache to ON, Method to Redis, Host to 127.0.0.1 and Port to 6379. Leave Username and Password empty, and the rest as it is.
- Click Save Changes.
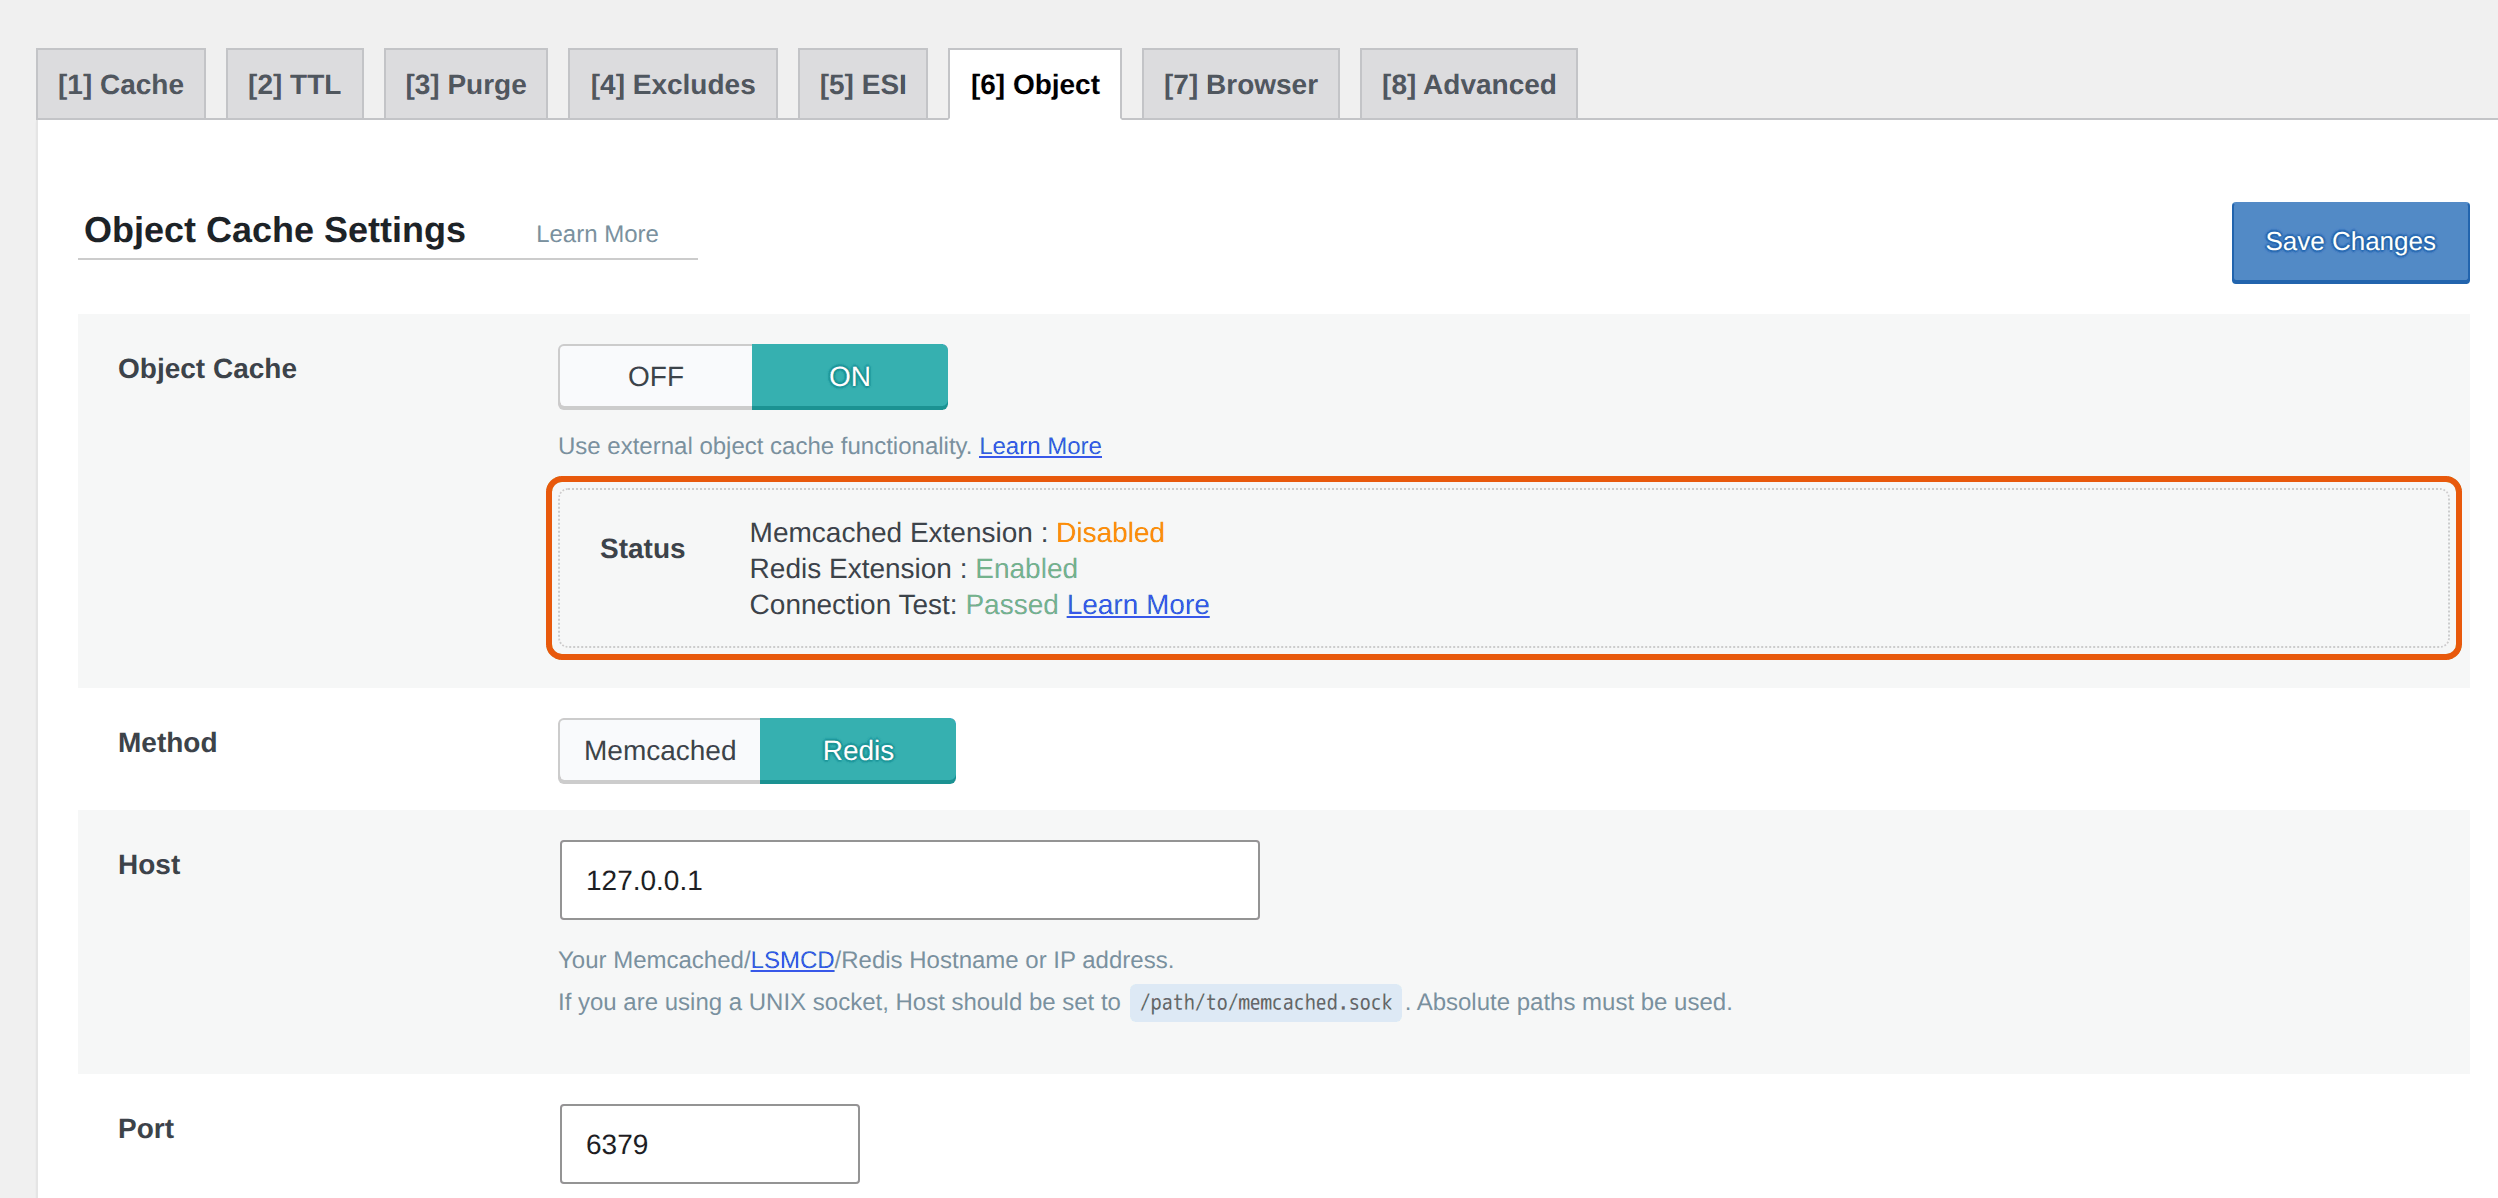
Status should now say Redis Extension: Enabled and Connection Test: Passed. That's it: WordPress keeps its database answers in Redis.
Using another caching plugin instead of LiteSpeed Cache? Turn on only one object cache, in one plugin, with the same address and port.
Give Redis a memory limit
Redis on your website has no memory limit of its own: it keeps whatever WordPress gives it, and the memory it uses counts towards your website's. For a shop or a busy website, give it a limit, so that when it's full, Redis drops the items used least recently.
- In Developer tools → Redis, click Edit redis.conf.
- Leave the first line,
bind 127.0.0.1, as it is: it keeps Redis private to your website. Below it, addmaxmemory 128mbandmaxmemory-policy allkeys-lru, each on a line of its own. Click Save.

- Scroll to the top of Developer tools and click Restart, then Restart again in the box that opens. Your website goes offline for a few seconds while it restarts, so do this at a quiet time.
128 MB suits most WordPress websites.
Clear the caches
You rarely need to: OPcache picks up changed files by itself, and LiteSpeed Cache updates Redis when you change your content. If a page still shows something out of date, in WordPress go to LiteSpeed Cache → Toolbox, and on the Purge tab click Purge All. It clears the page cache, Redis and OPcache together.
If something's not right
- Connection Test says Failed. Check the Redis switch is on in Developer tools, and that Host is 127.0.0.1 and Port is 6379, with no spaces. Then save again.
- Your website shows errors, or old content that Purge All doesn't fix. Turn Object Cache off in LiteSpeed Cache's Object tab and save, then check your website. If that fixes it, a plugin doesn't work well with an object cache: open a ticket and tell us which plugins you use.
- Turning Redis off? Set Object Cache to OFF in LiteSpeed Cache first, then turn off the Redis switch.
Next steps
See LiteSpeed Cache settings for the page cache and when to clear it, and Speed up WordPress with MariCDN to serve your images and files from closer to your visitors.
Rather we looked after it?
WordPress Care updates your site, checks it after every update, and fixes anything an update breaks.
Keep reading
LiteSpeed Cache settings
The settings we recommend: the page cache, opcode caching and Redis for faster dashboards and shops, and a CDN.
Read the guideSpeed up WordPress with MariCDN
Connect the CDN plugin that comes with your WordPress, free for 3 GB a month, in four steps.
Read the guideIncrease the upload size and PHP limits
Which PHP limit causes which WordPress error, and how to raise it yourself.
Read the guide